Rating & Charging
The objective of the Rating & Charging Configuration chapter is to provide comprehensive instructions on how to configure the rating and charging aspects of OCS.io. This chapter focuses on configuring entities such as GL Code, Tax, Charging Class, Special Days, and Time Periods. By properly configuring these entities, you can define the rules and parameters for rating and charging your products and services in OCS.io.
The chapter will guide you through the process of setting up GL Codes to categorize your financial transactions and facilitate accurate accounting. You will also learn how to configure Taxes to apply appropriate tax rates to your products and services based on regional or organizational requirements.
In addition, you will discover how to define Charging Classes, which enable you to group similar products or services and apply specific charging rules to them. Special Days and Time Periods configuration will allow you to define time-based charging scenarios, such as peak hours, off-peak hours, or seasonal rates.
GL Codes
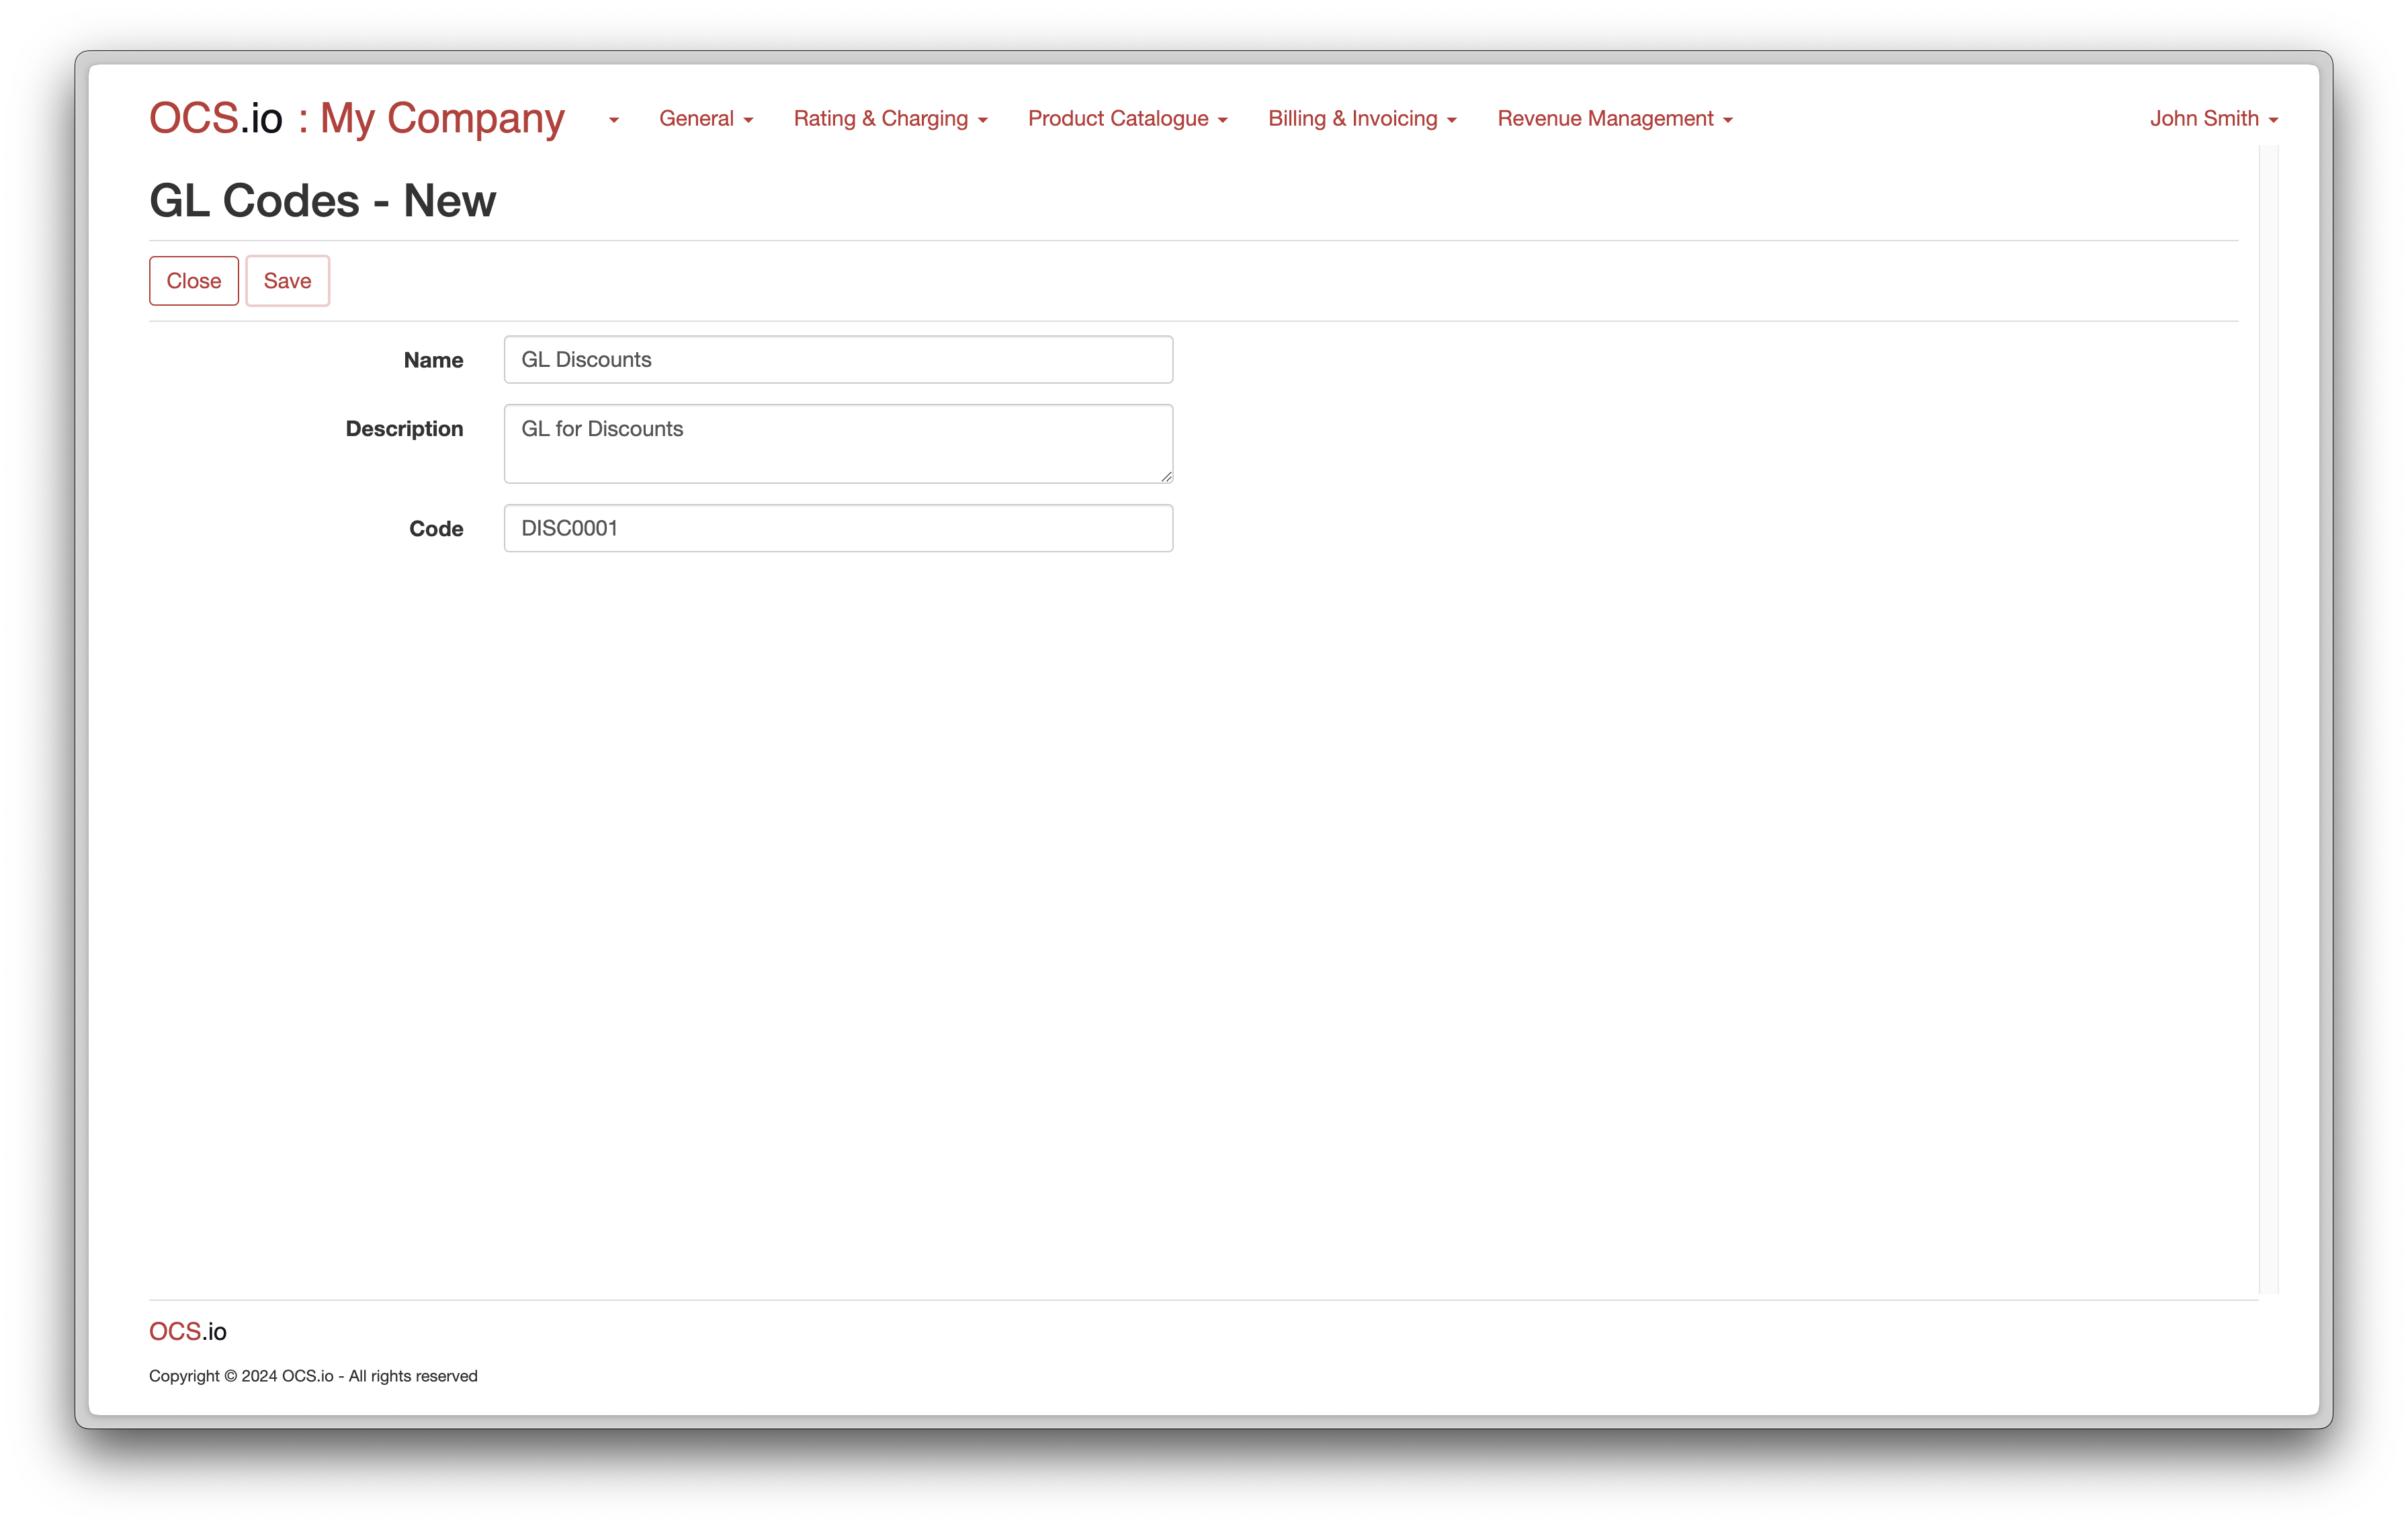
The OCS.io supports General Ledger (GL) Codes for accounting purposes. GL Codes are used to categorize financial transactions and provide a way to track financial information within the system. The GL Codes can be configured within the Product Catalogue of the system. By configuring the GL Codes, the system can track financial transactions related to the organization’s various products and services. This enables accurate financial reporting and analysis and easier auditing and compliance with accounting standards. The Product Catalogue is a core component of the OCS.io, and GL Codes play a vital role in the accounting and financial management of an organization using the system.
To configure GL Codes, follow these steps:
-
Access the Core Configuration perspective in the OCS.io user interface.
-
Select the .
-
Click on the + (New) button to create a new GL Code.
-
Fill in the required information in the form:

| Item | Description |
|---|---|
Name |
Enter the name of the GL Code. |
Description |
Optionally, enter the description of the GL Code. |
Code |
Enter the External code to which the GL Code will be mapped in the result of rating, charging, and billing. |
Repeat the above steps to configure additional GL Codes for Usage, Discounts, and Taxes:


Taxes
In OCS.io, calculating Taxes is critical to the Rating & Charging process. The system offers out-of-the-box functionality to calculate taxes, which involves adding a defined tax rate to each event during Online Rating & Charging or a group of events with the same tax category during the Billing process. This functionality is suitable for businesses or tax jurisdictions with straightforward tax calculation requirements, such as most EU countries.
The system allows for the unlimited definition of tax rates, including standard rates (e.g., 19%), reduced rates (e.g., 5%), and no-tax rates (with a value of 0%). However, suppose your business or tax jurisdiction requires more complex Taxation, such as in the United States of America. In that case, the system offers the option to configure no-tax rates and process taxation using an external vendor, such as Vertex.
| For more information on tax configuration and customization, refer to the documentation on Taxation. |
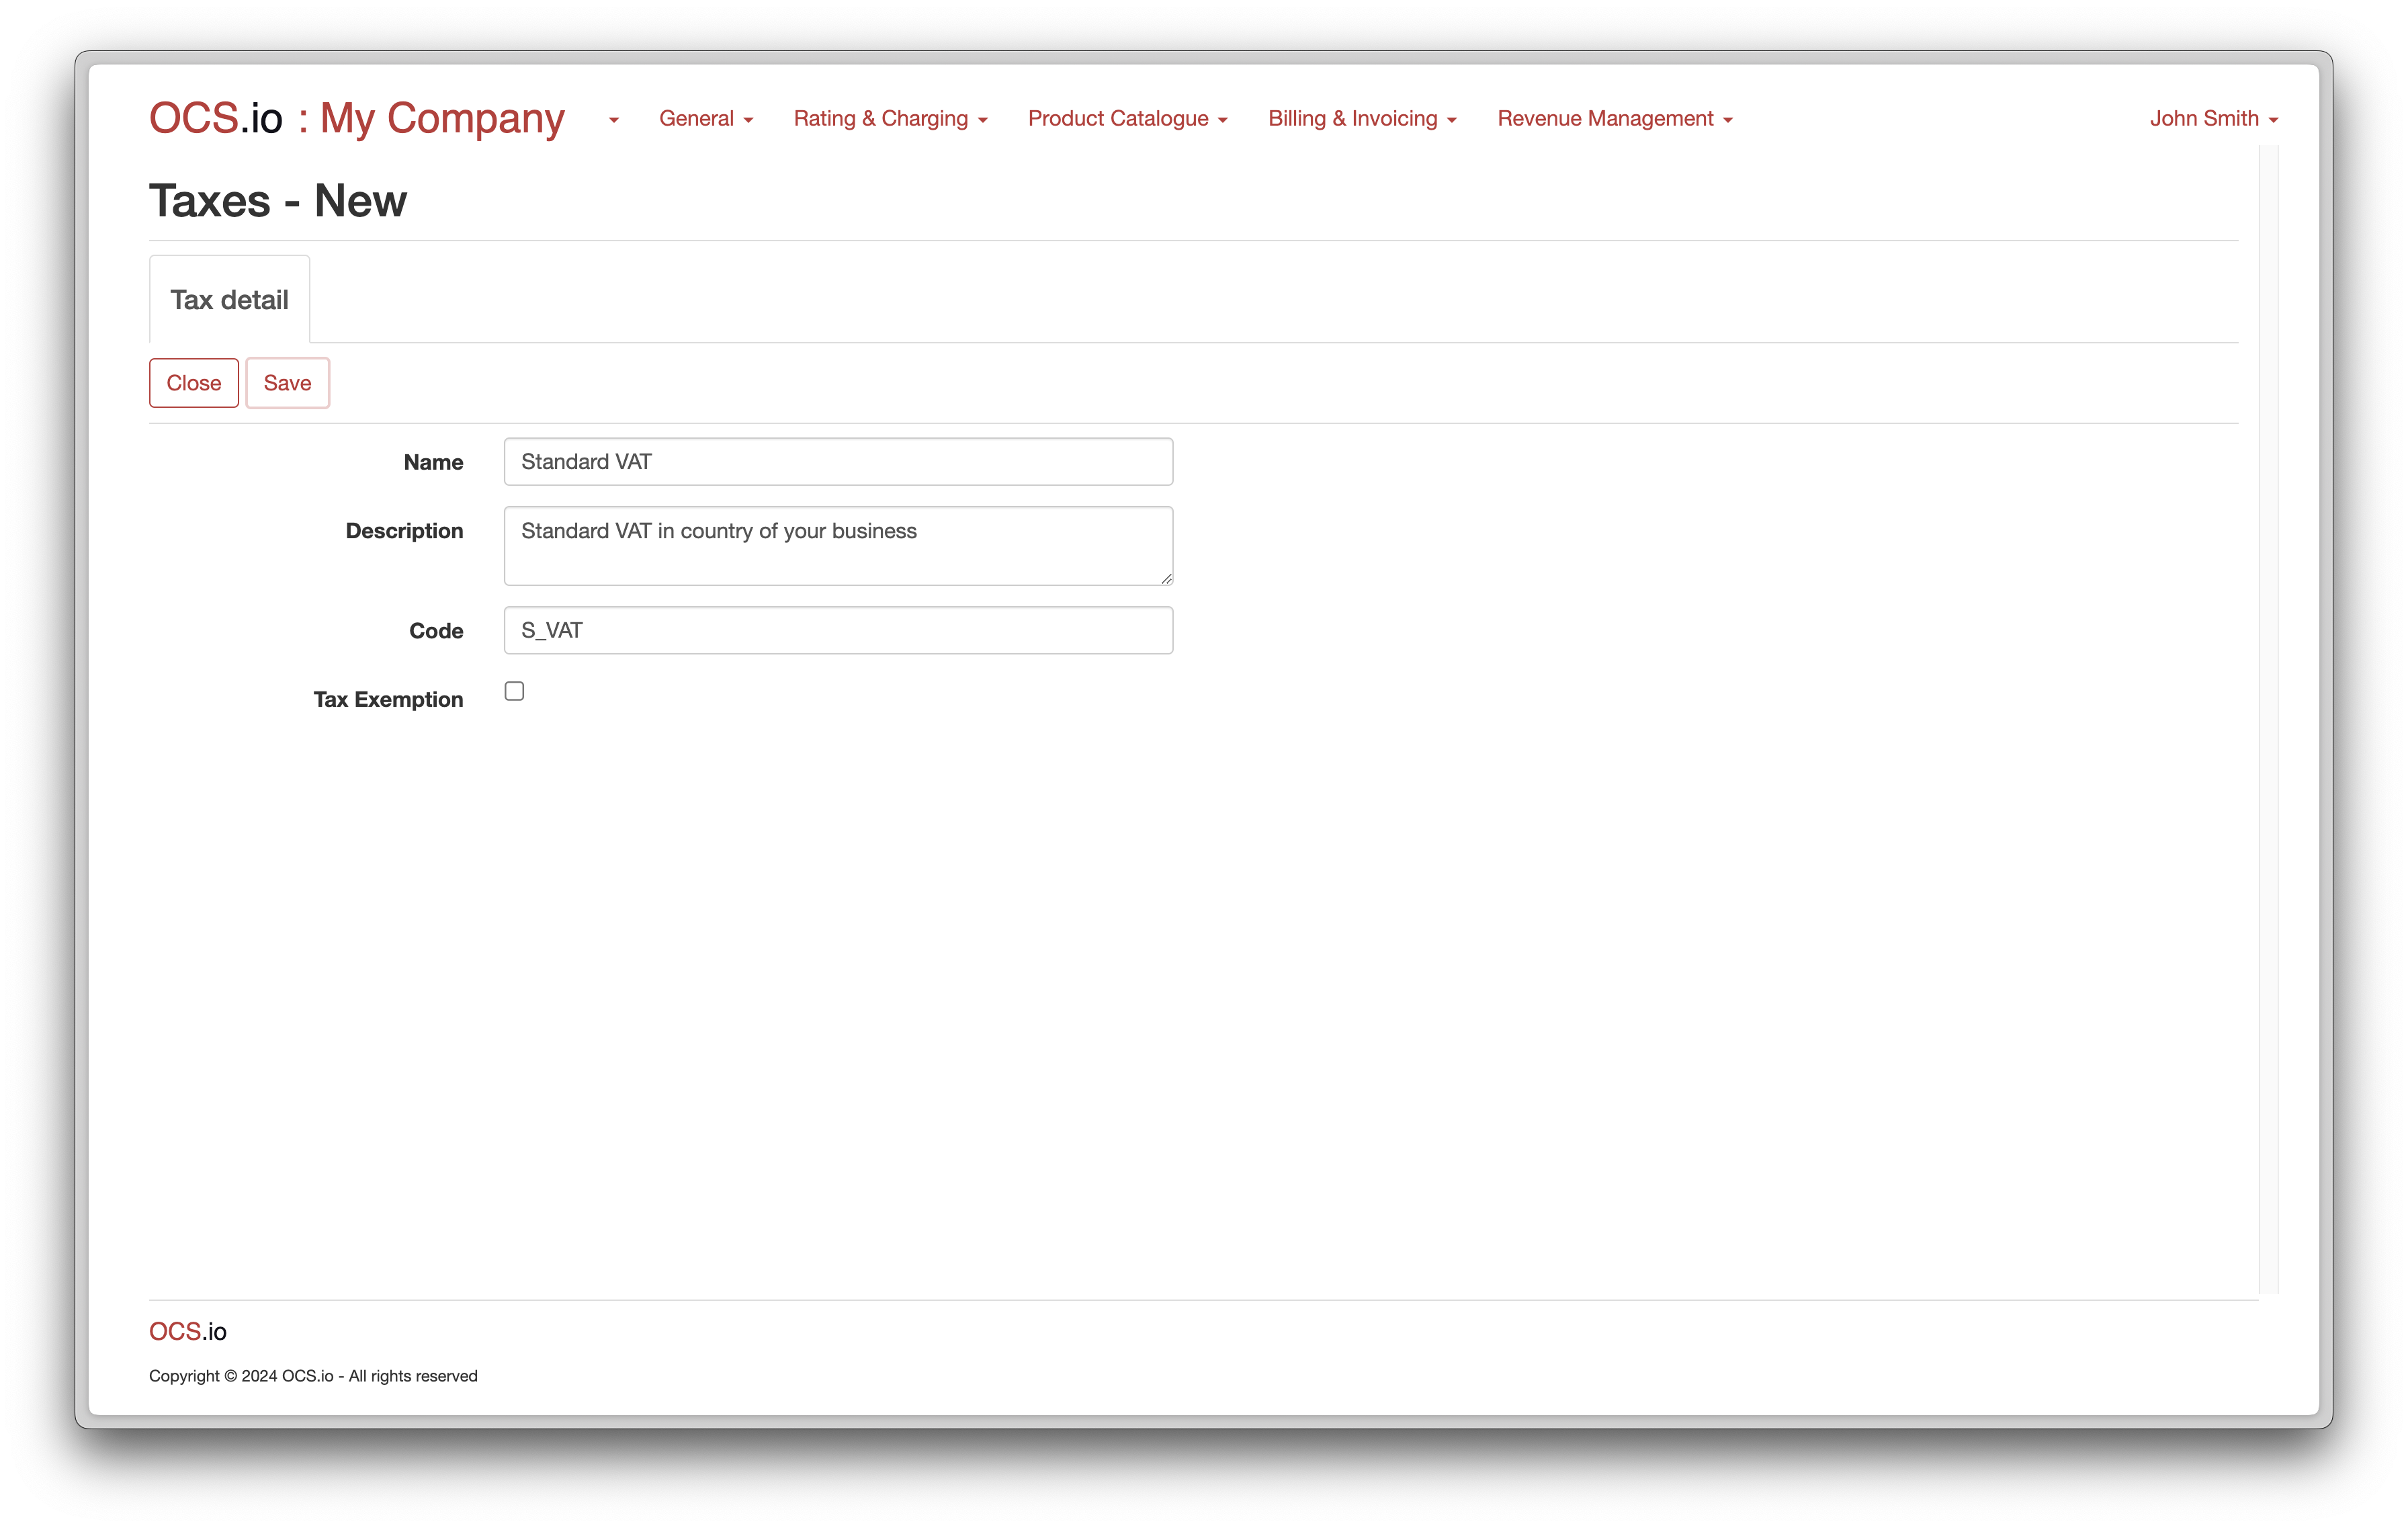
To configure Taxes, follow these steps:
-
Access the Core Configuration perspective in the OCS.io user interface.
-
Select the .
-
Click on the + (New) button to create a new Tax.
-
Fill in the required information in the form:
Item Description Name
Enter the name of the Tax.
Description
Optionally, enter the description of the Tax.
Code
Enter the External code to which the Tax will be mapped in the result of rating, charging, and billing.
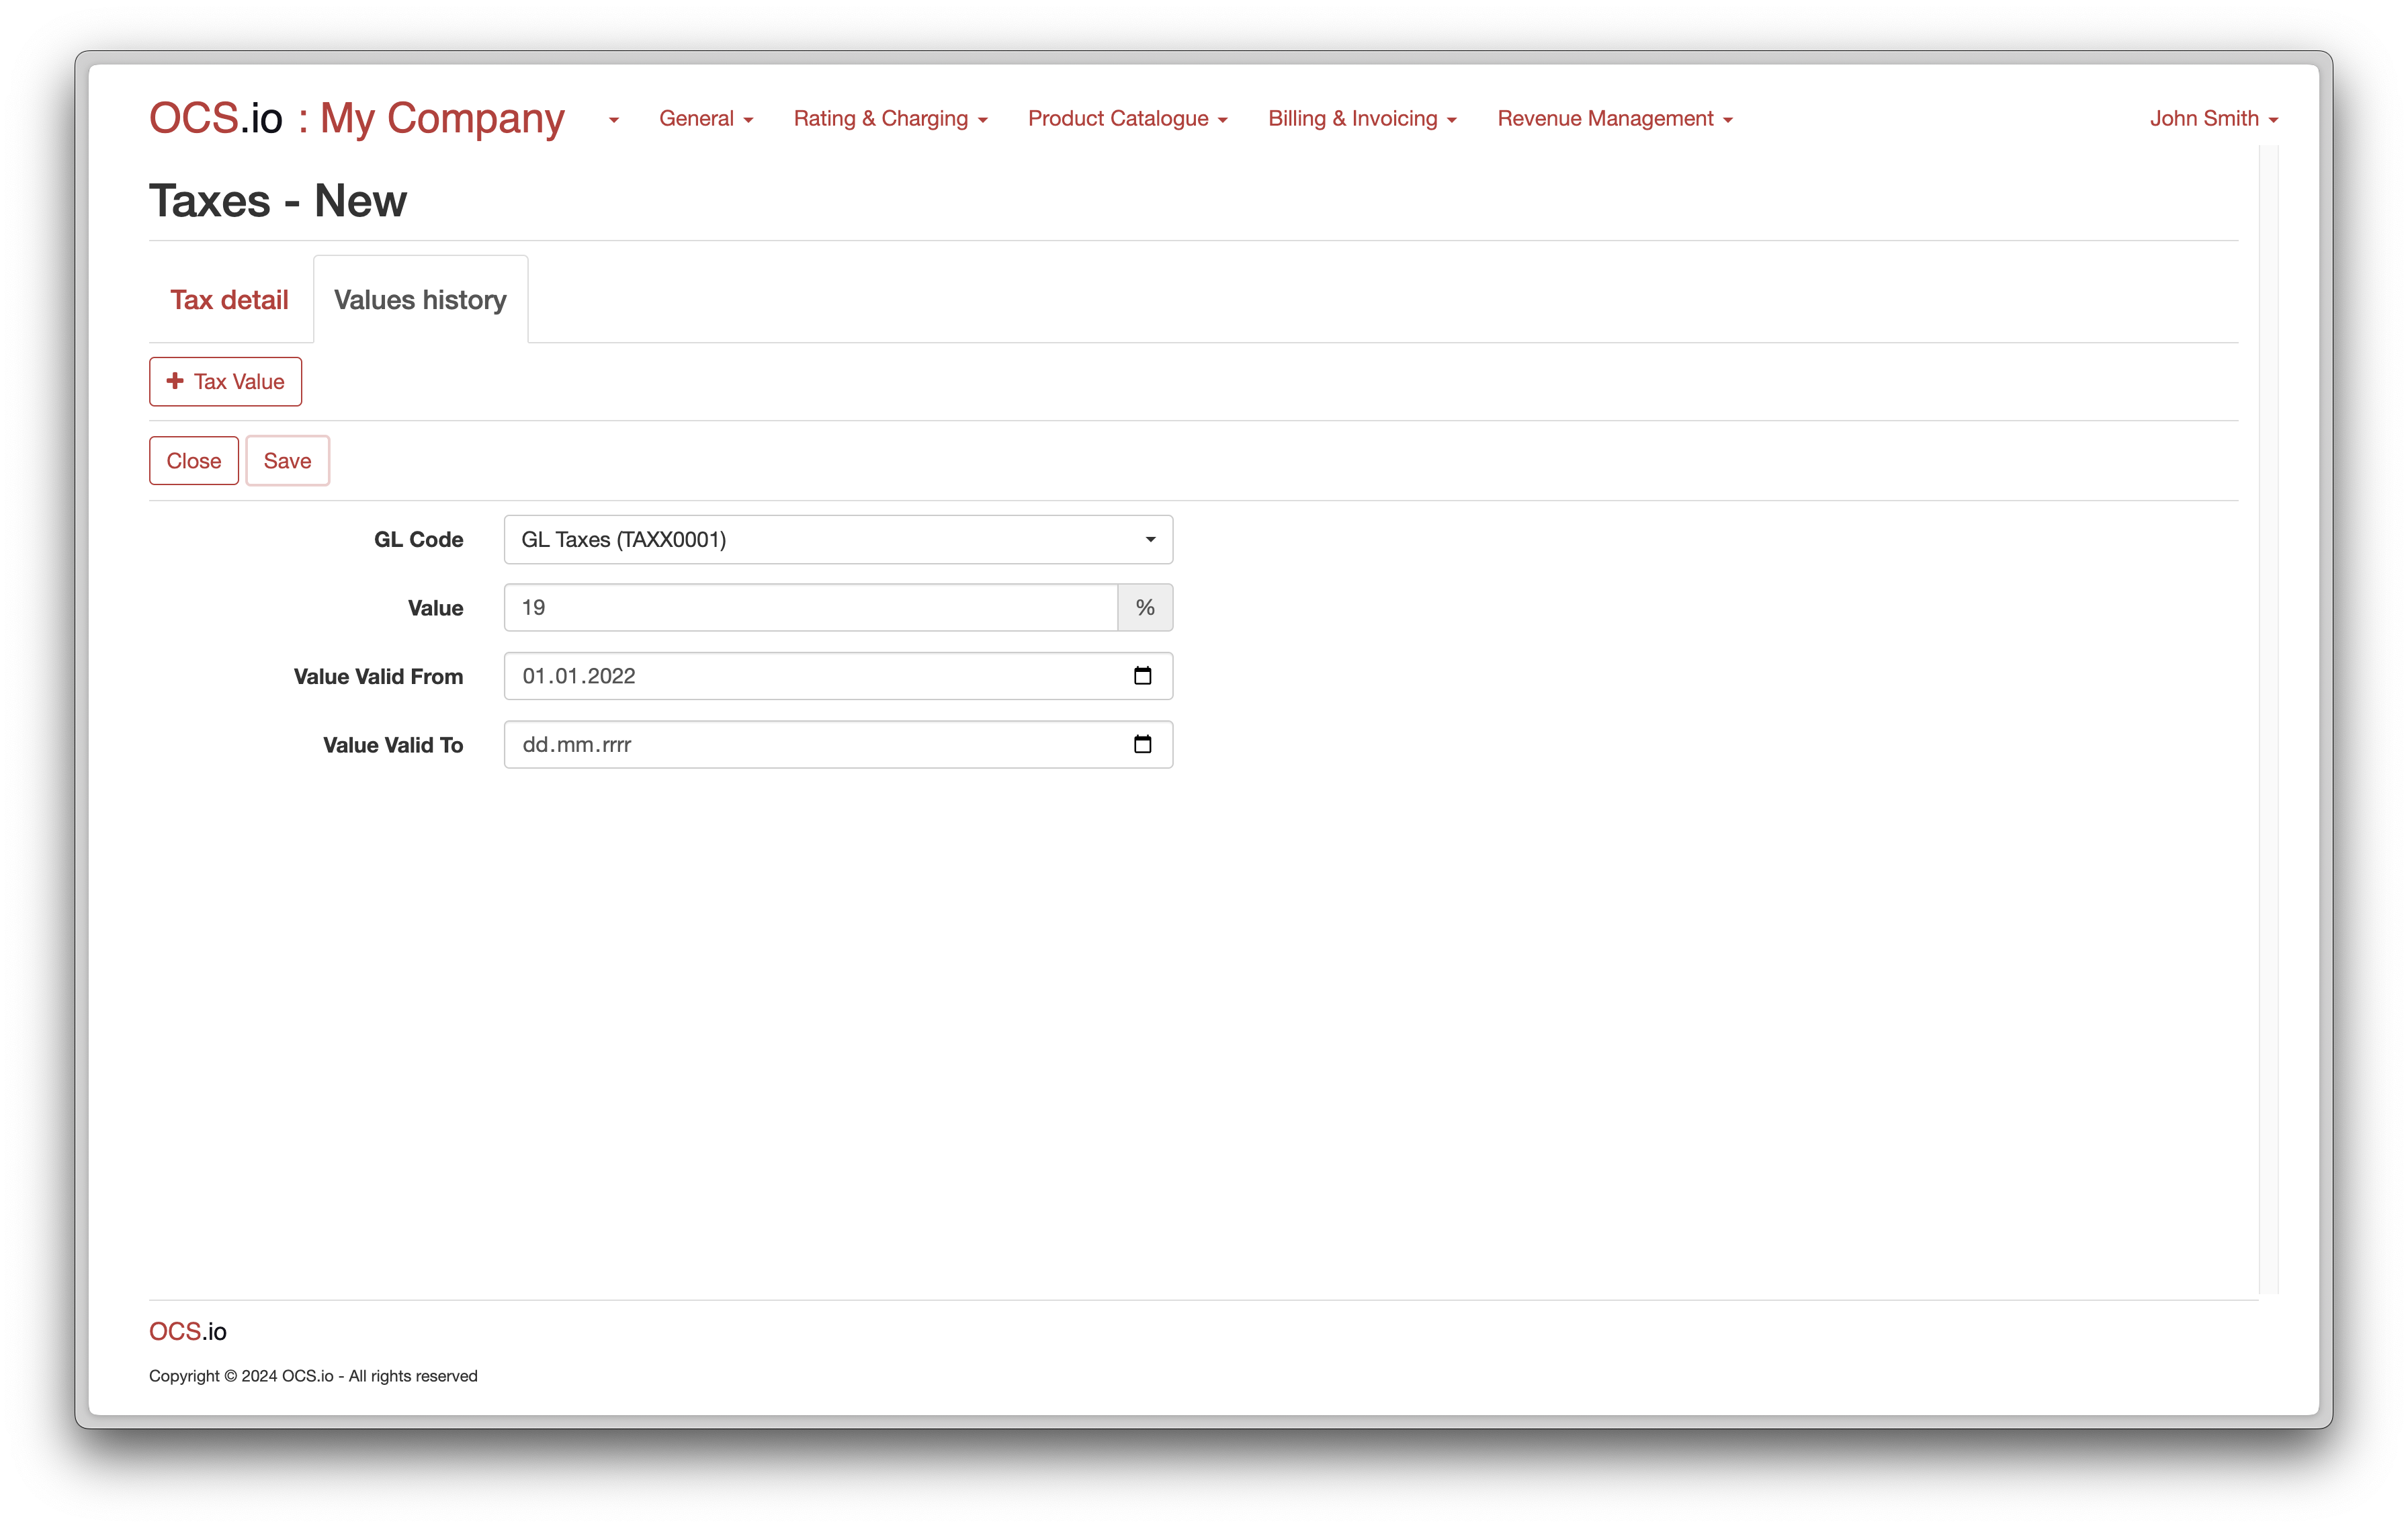
Once you click on the Save button, the Value History tab will be shown. Here, you can configure different values of the Tax for different time periods.
-
Click on the + (New) button in the Values History tab to add a new Tax value.
-
Fill in the required information in the form:
Item Description GL Code
Choose the GL Code which will be assigned to the Tax.
Value
Enter the Tax Value. The value should be entered as a percentage, e.g., 19 for 19%. You can enter precision up to 2 decimals.
Value Valid From
Enter the date from when this Tax Value is valid.
Value Valid To
Enter the date till when this Tax Value is valid. When no value is entered, the Tax Value is valid indefinitely.
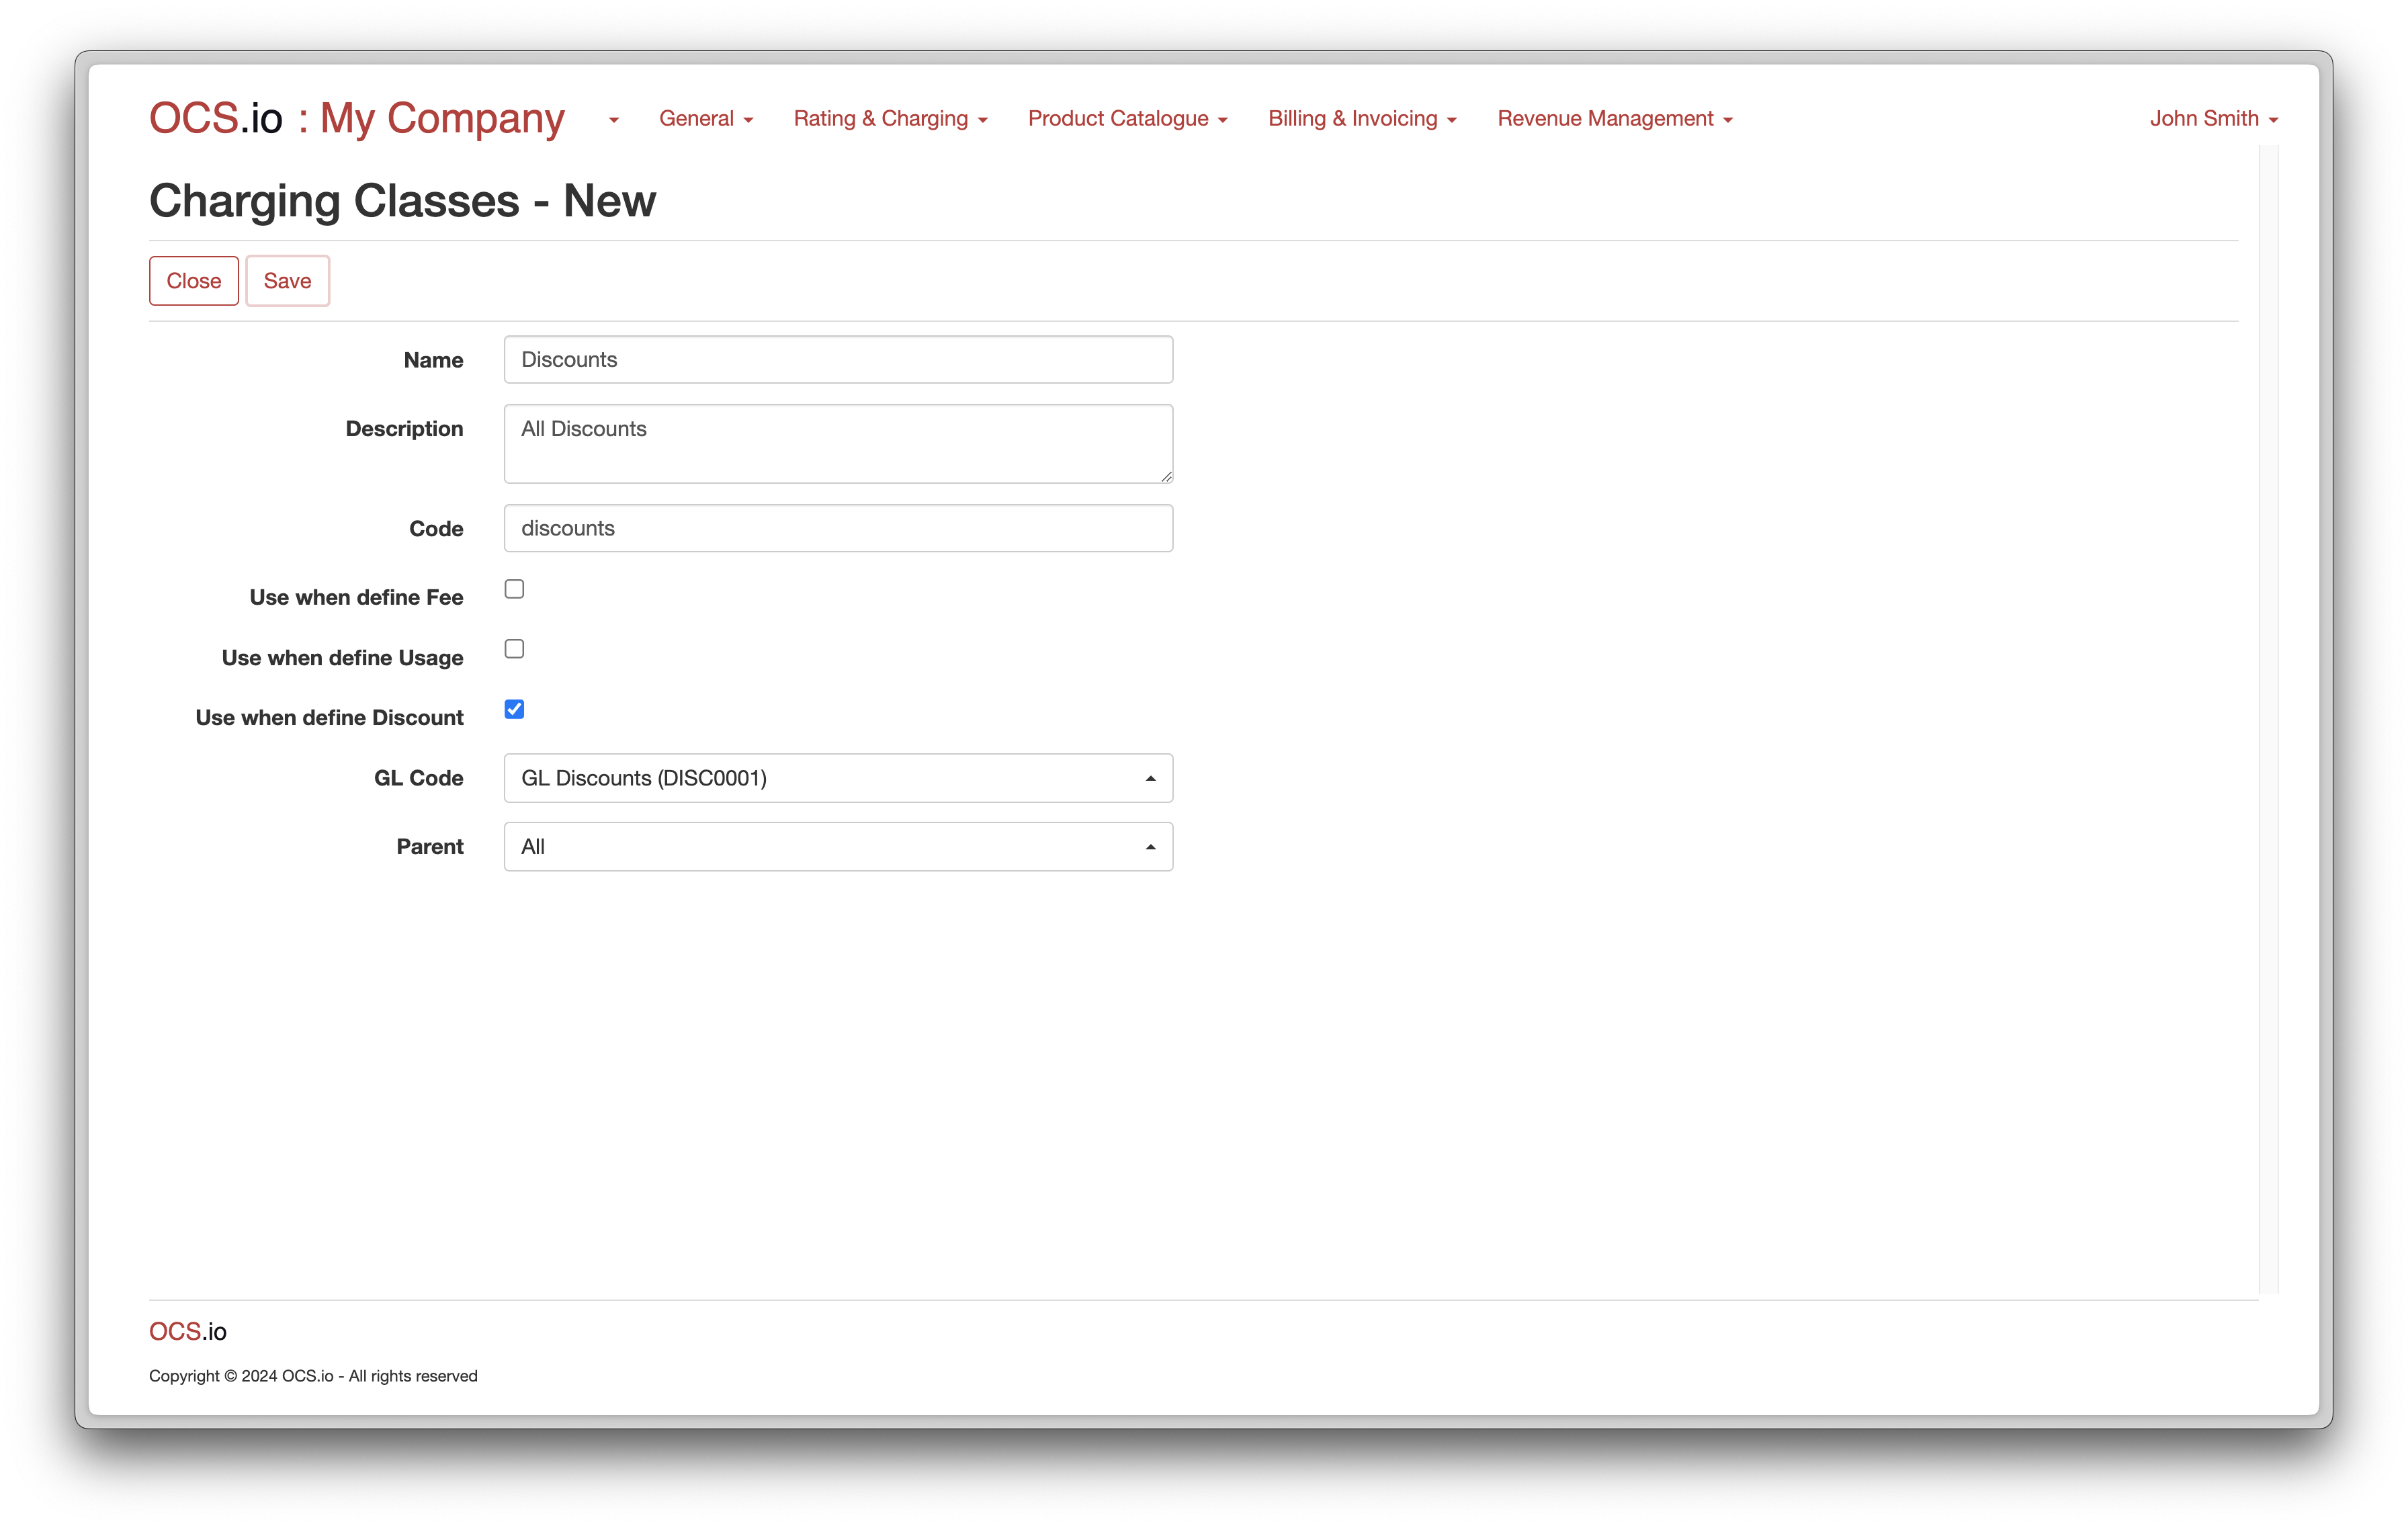
Charging Classes
Charging Class is a fundamental entity within OCS.io that defines how charges for various services and events are calculated. A charging class is closely linked with other configurations within OCS.io and is used to determine the price and tariff applicable to a chargeable event.
OCS.io enables efficient and accurate charging and billing management by defining charging classes for different services and events. For example, charging classes may be defined for a one-time or recurring fee, data usage, voice calls, SMS messages, and other billable activities.
| For more information on charging classes and their configuration within OCS.io, please refer to the documentation here. |
Charging Class model supports tree configuration. This means that you can configure all above for certain node of the tree, automatically it will be applied to all sub-nodes.
Assume following configuration:
-
All
-
Usage
-
Content
-
Movies
-
Horrors
-
Action
-
Adult
-
-
Electronic Books
-
Classic
-
Best-sellers
-
-
-
-
Fees
-
Activation Fees
-
Recurring Fees
-
One-Time Fees
-
Termination Fees
-
-
Discounts
-
Usage Discount
-
Fee Discount
-
-
You can:
-
configure Discount 15% on all Horrors
-
configure 10 Books for free of category Classic
-
configure Minimal Commitment on all Usage and all Fees
-
configure Cost Control Balance of 100 EUR per Month on Movies
Configuration of the Charging Classes shall be found under the Core Configuration perspective, menu .

| Item | Description |
|---|---|
Name |
Enter the name of the Charging Class. |
Description |
Optionally, enter the description of the Charging Class. |
Code |
Enter the External code to which Charging Class will be mapped in the result of rating, charging, and billing. |
Use when define Fee |
If checked, Charging Class is used when defining Fee. |
Use when define Usage |
If checked, Charging Class is used when defining Usage. |
Use when define Discount |
If checked, Charging Class is used when defining Discount. |
GL Code |
Optionally choose GL Code which will be assigned to the Charging Class. |
Parent |
Optionally choose parent Charging Class. |
You can similarly configure additional Charging Classes for Usage and Discounts:

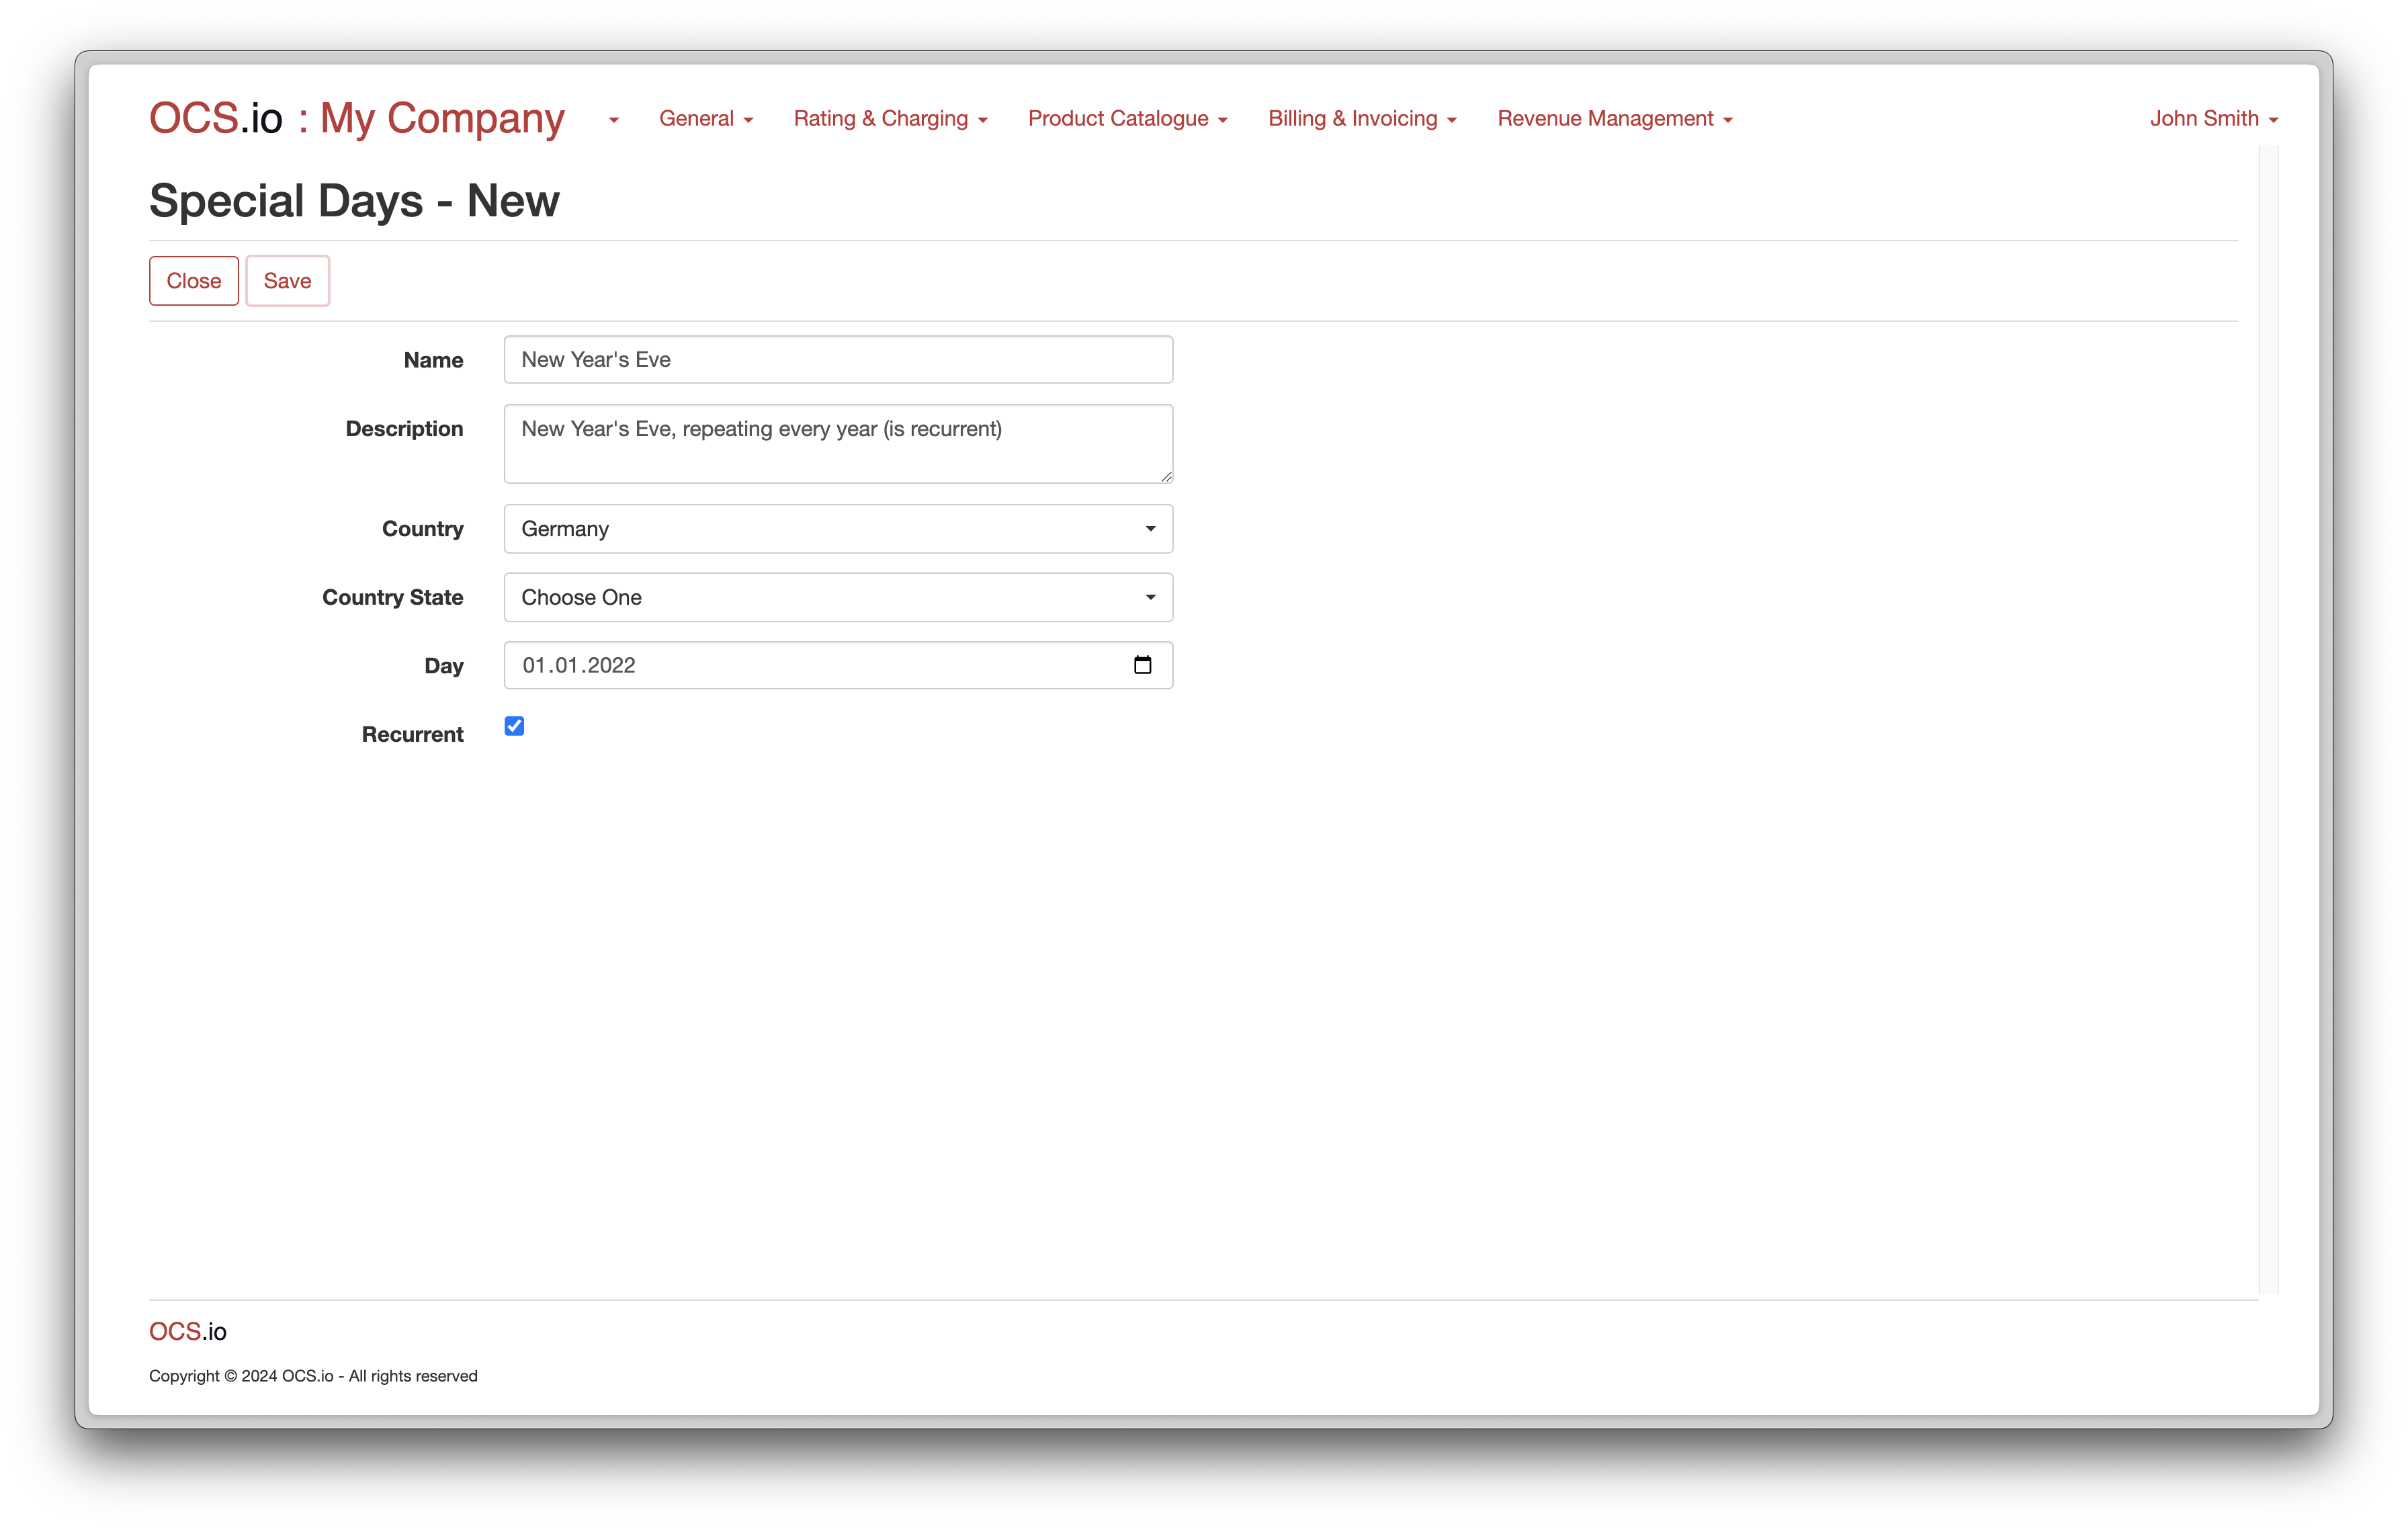
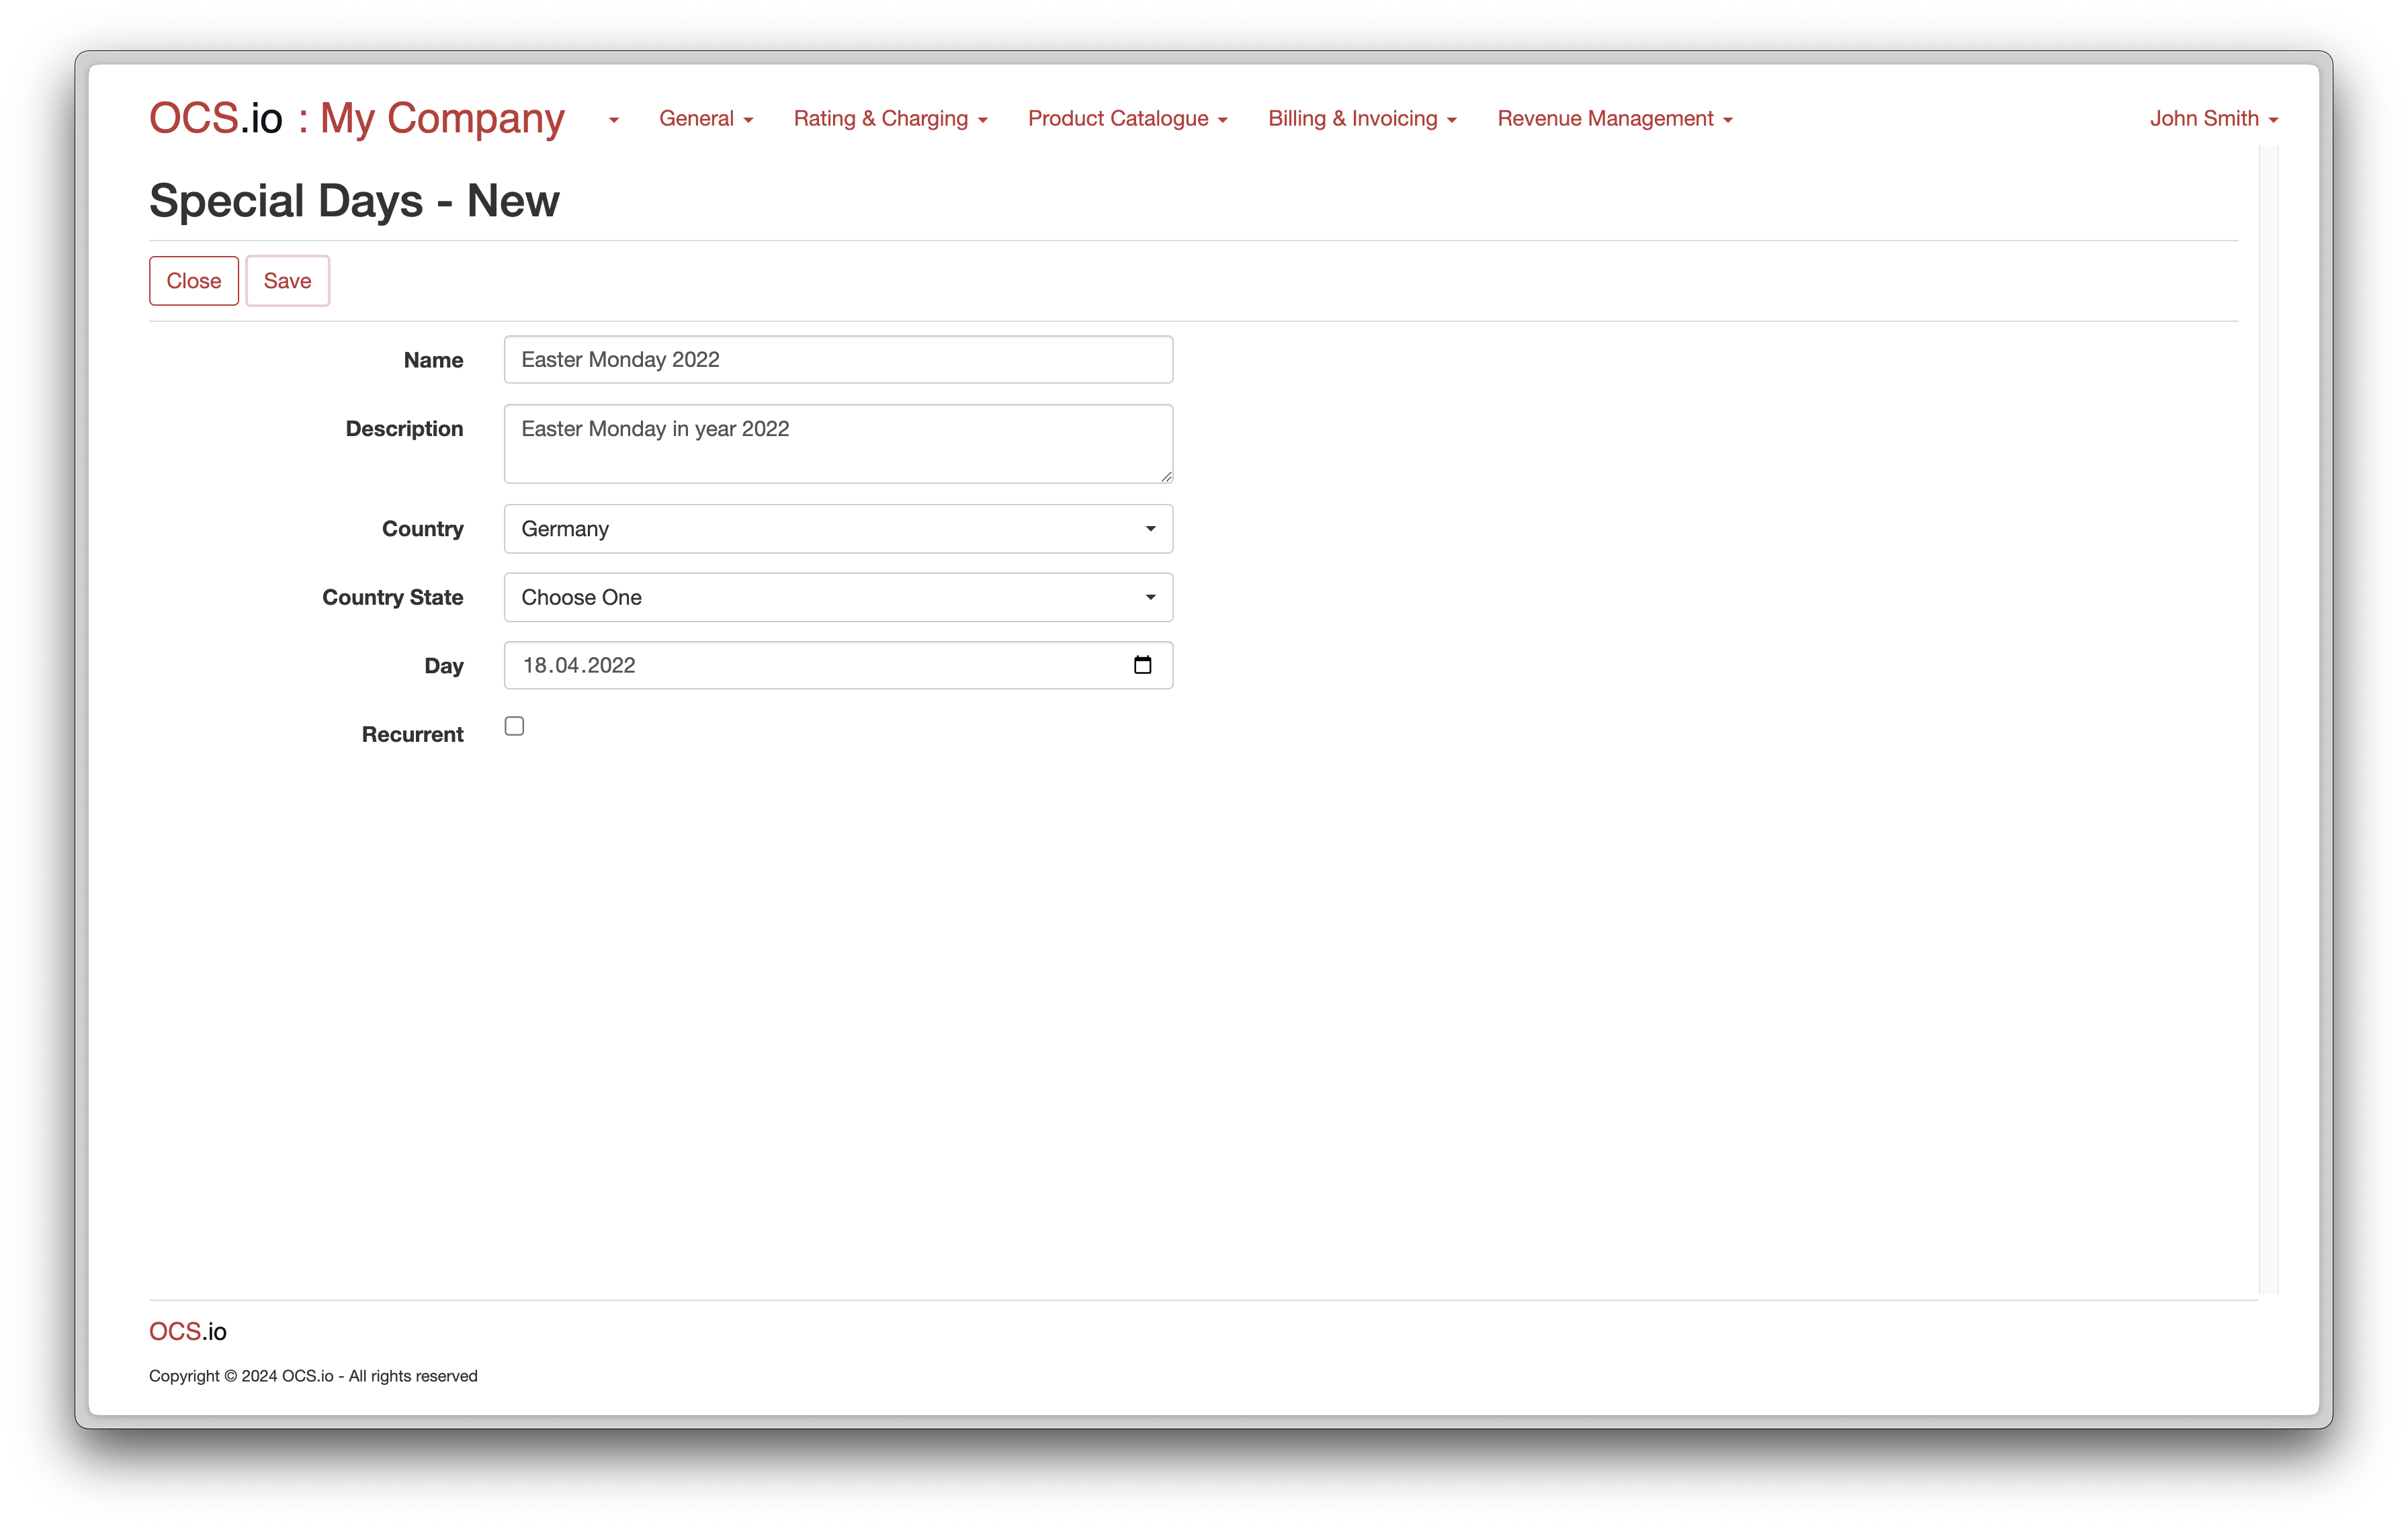
Special Days
In OCS.io, a Special Day is a predefined date representing a public holiday or other special days in a specific country or region. This feature is used to identify specific days with a different pricing structure or charging model than regular days. For example, some countries may have other pricing plans for weekends or public holidays. The special day feature allows the system to apply the correct pricing to such days accurately. Once a special day is defined, the system automatically applies the appropriate pricing structure or charging model to the affected events.
To configure a special day, follow these steps:
-
Access the Core Configuration perspective in the OCS.io user interface.
-
Select the .
-
Click on the + (New) button to create a new special day.
-
Fill in the required information in the form:
For a recurrent special day:
| Item | Description |
|---|---|
Name |
Enter the name of the special day. |
Description |
Optionally, enter the description of the special day. |
Country |
Choose the country for which the special day is configured. If a special day is observed in multiple countries, you will need to configure it separately for each country. |
Country state |
Optionally choose the specific state within the country for which the special day is configured. |
Day |
Enter the date of the special day. |
Recurrent |
Check this option if the special day occurs every year. |
For a non-recurrent special day:
| Item | Description |
|---|---|
Name |
Enter the name of the special day. |
Description |
Optionally, enter the description of the special day. |
Country |
Choose the country for which the special day is configured. |
Country state |
Optionally choose the specific state within the country for which the special day is configured. |
Day |
Enter the date of the special day. |
Recurrent |
Leave this option unchecked. |
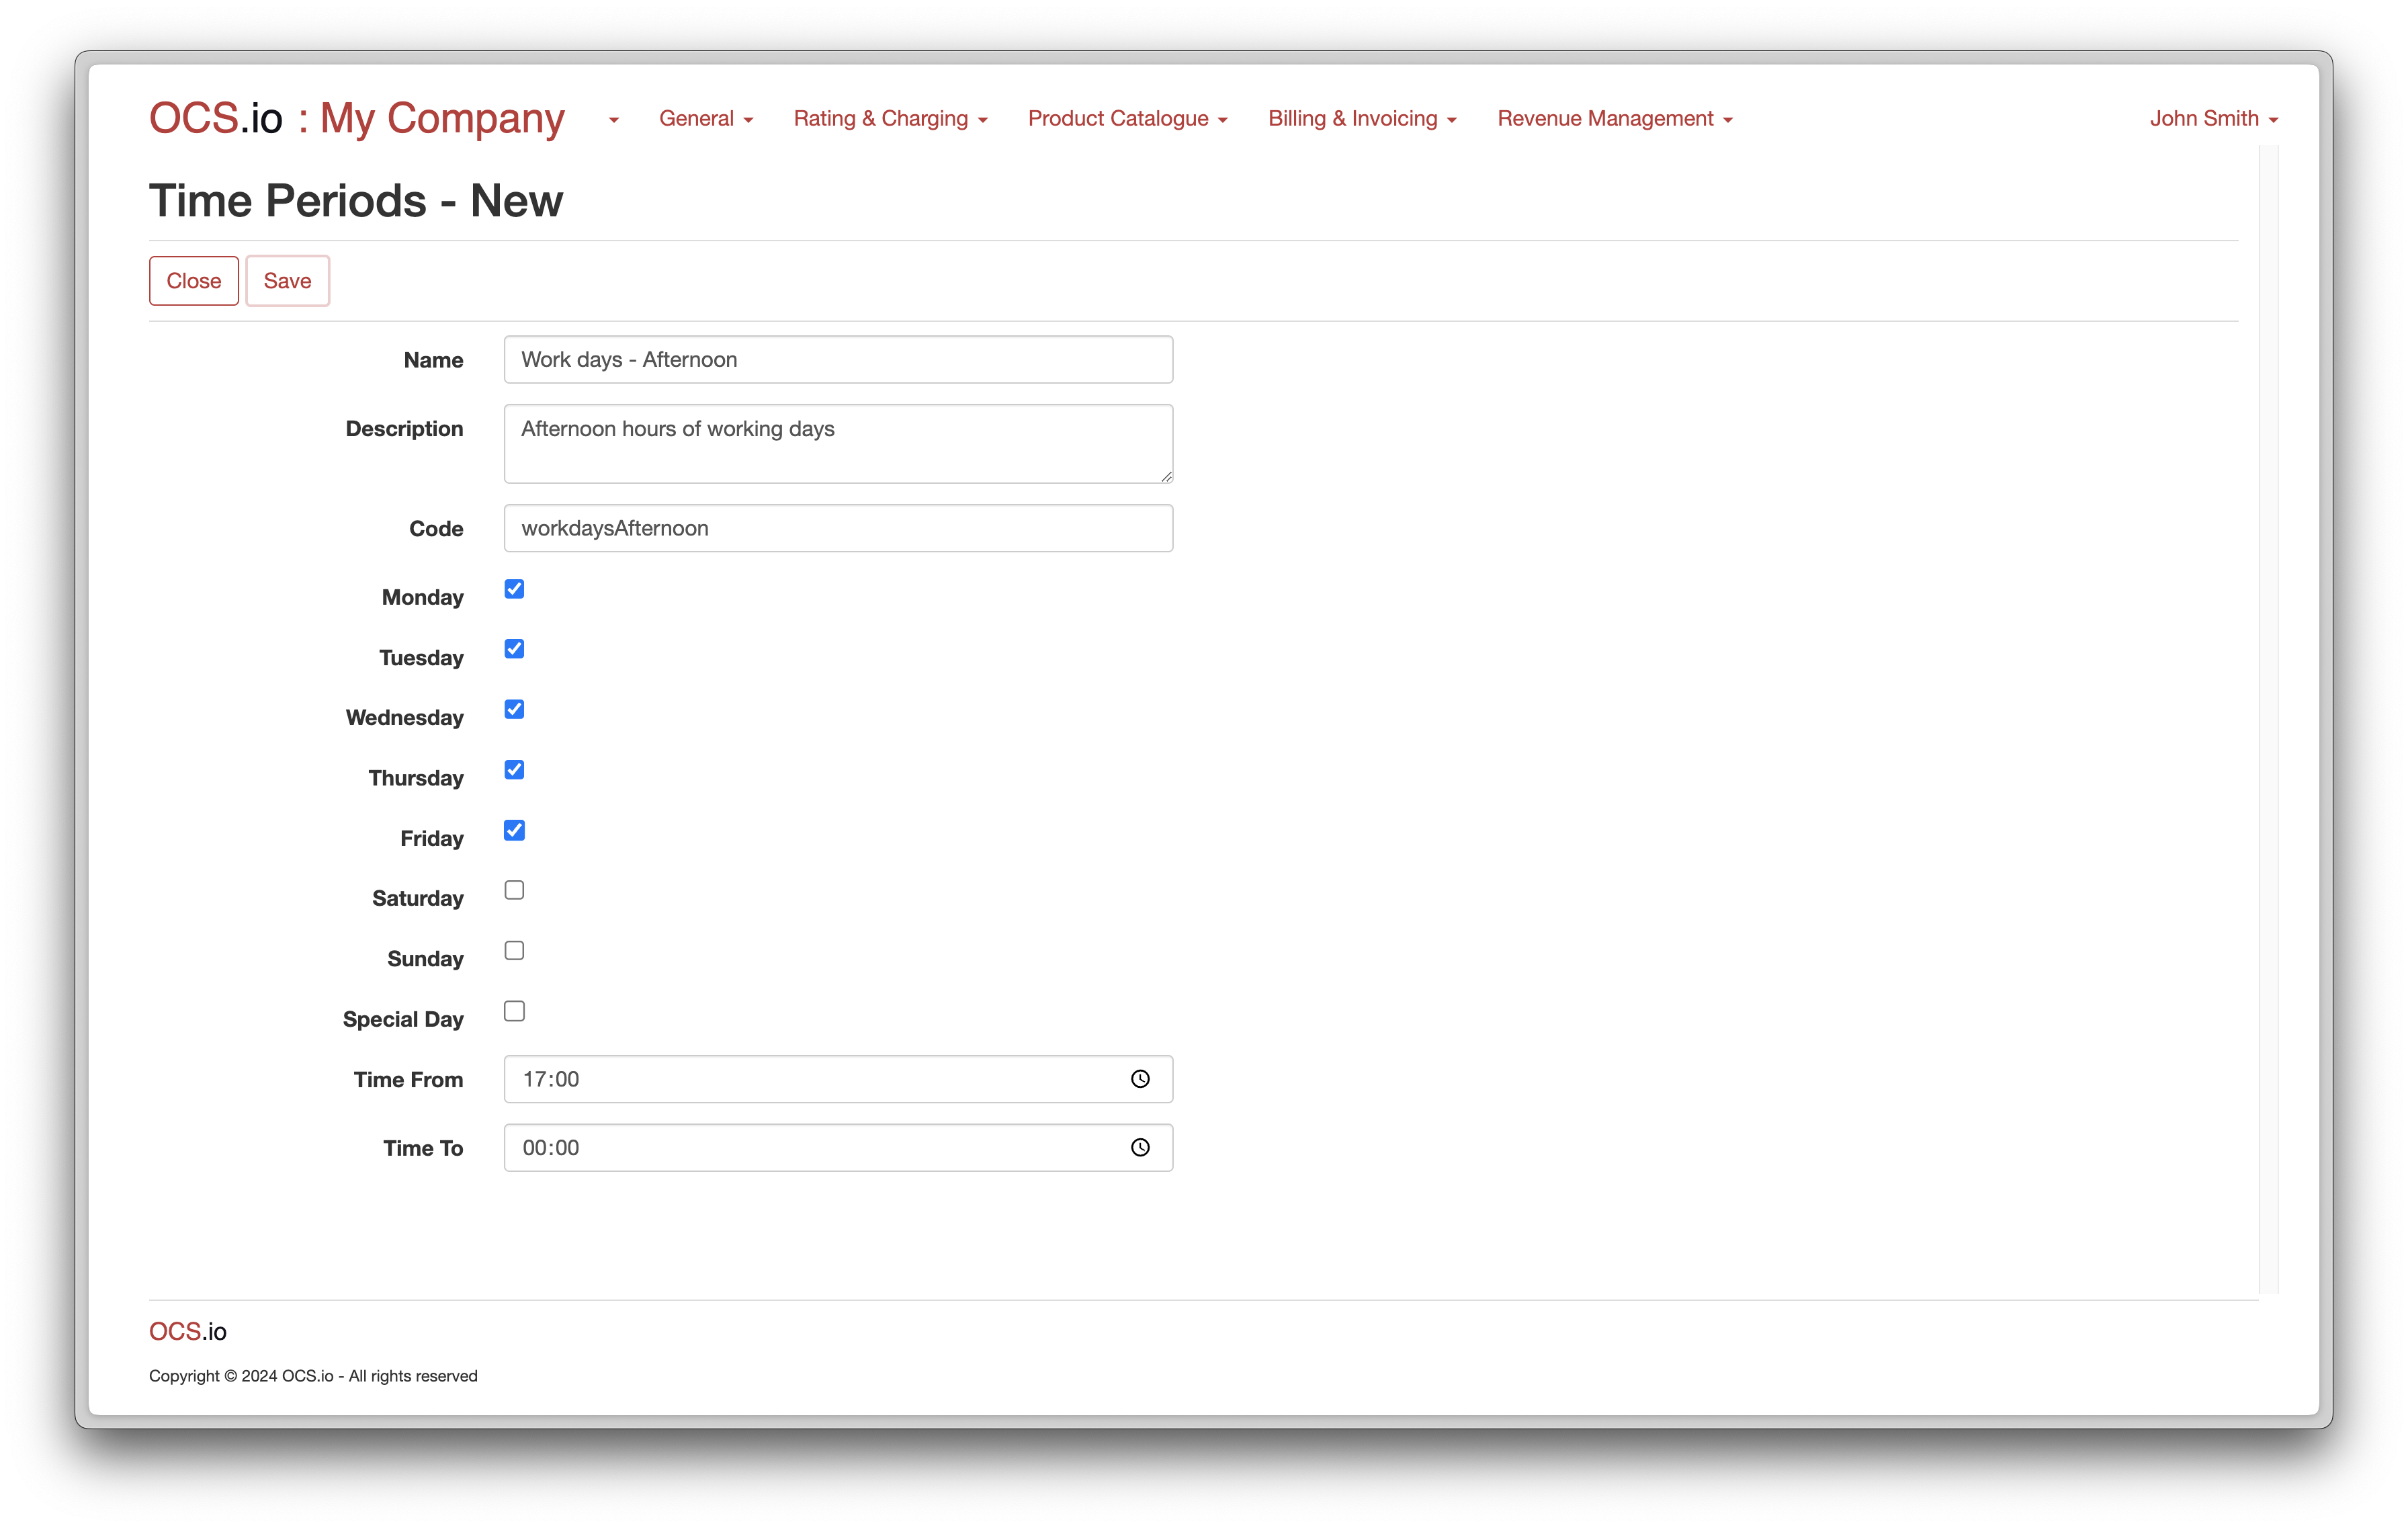
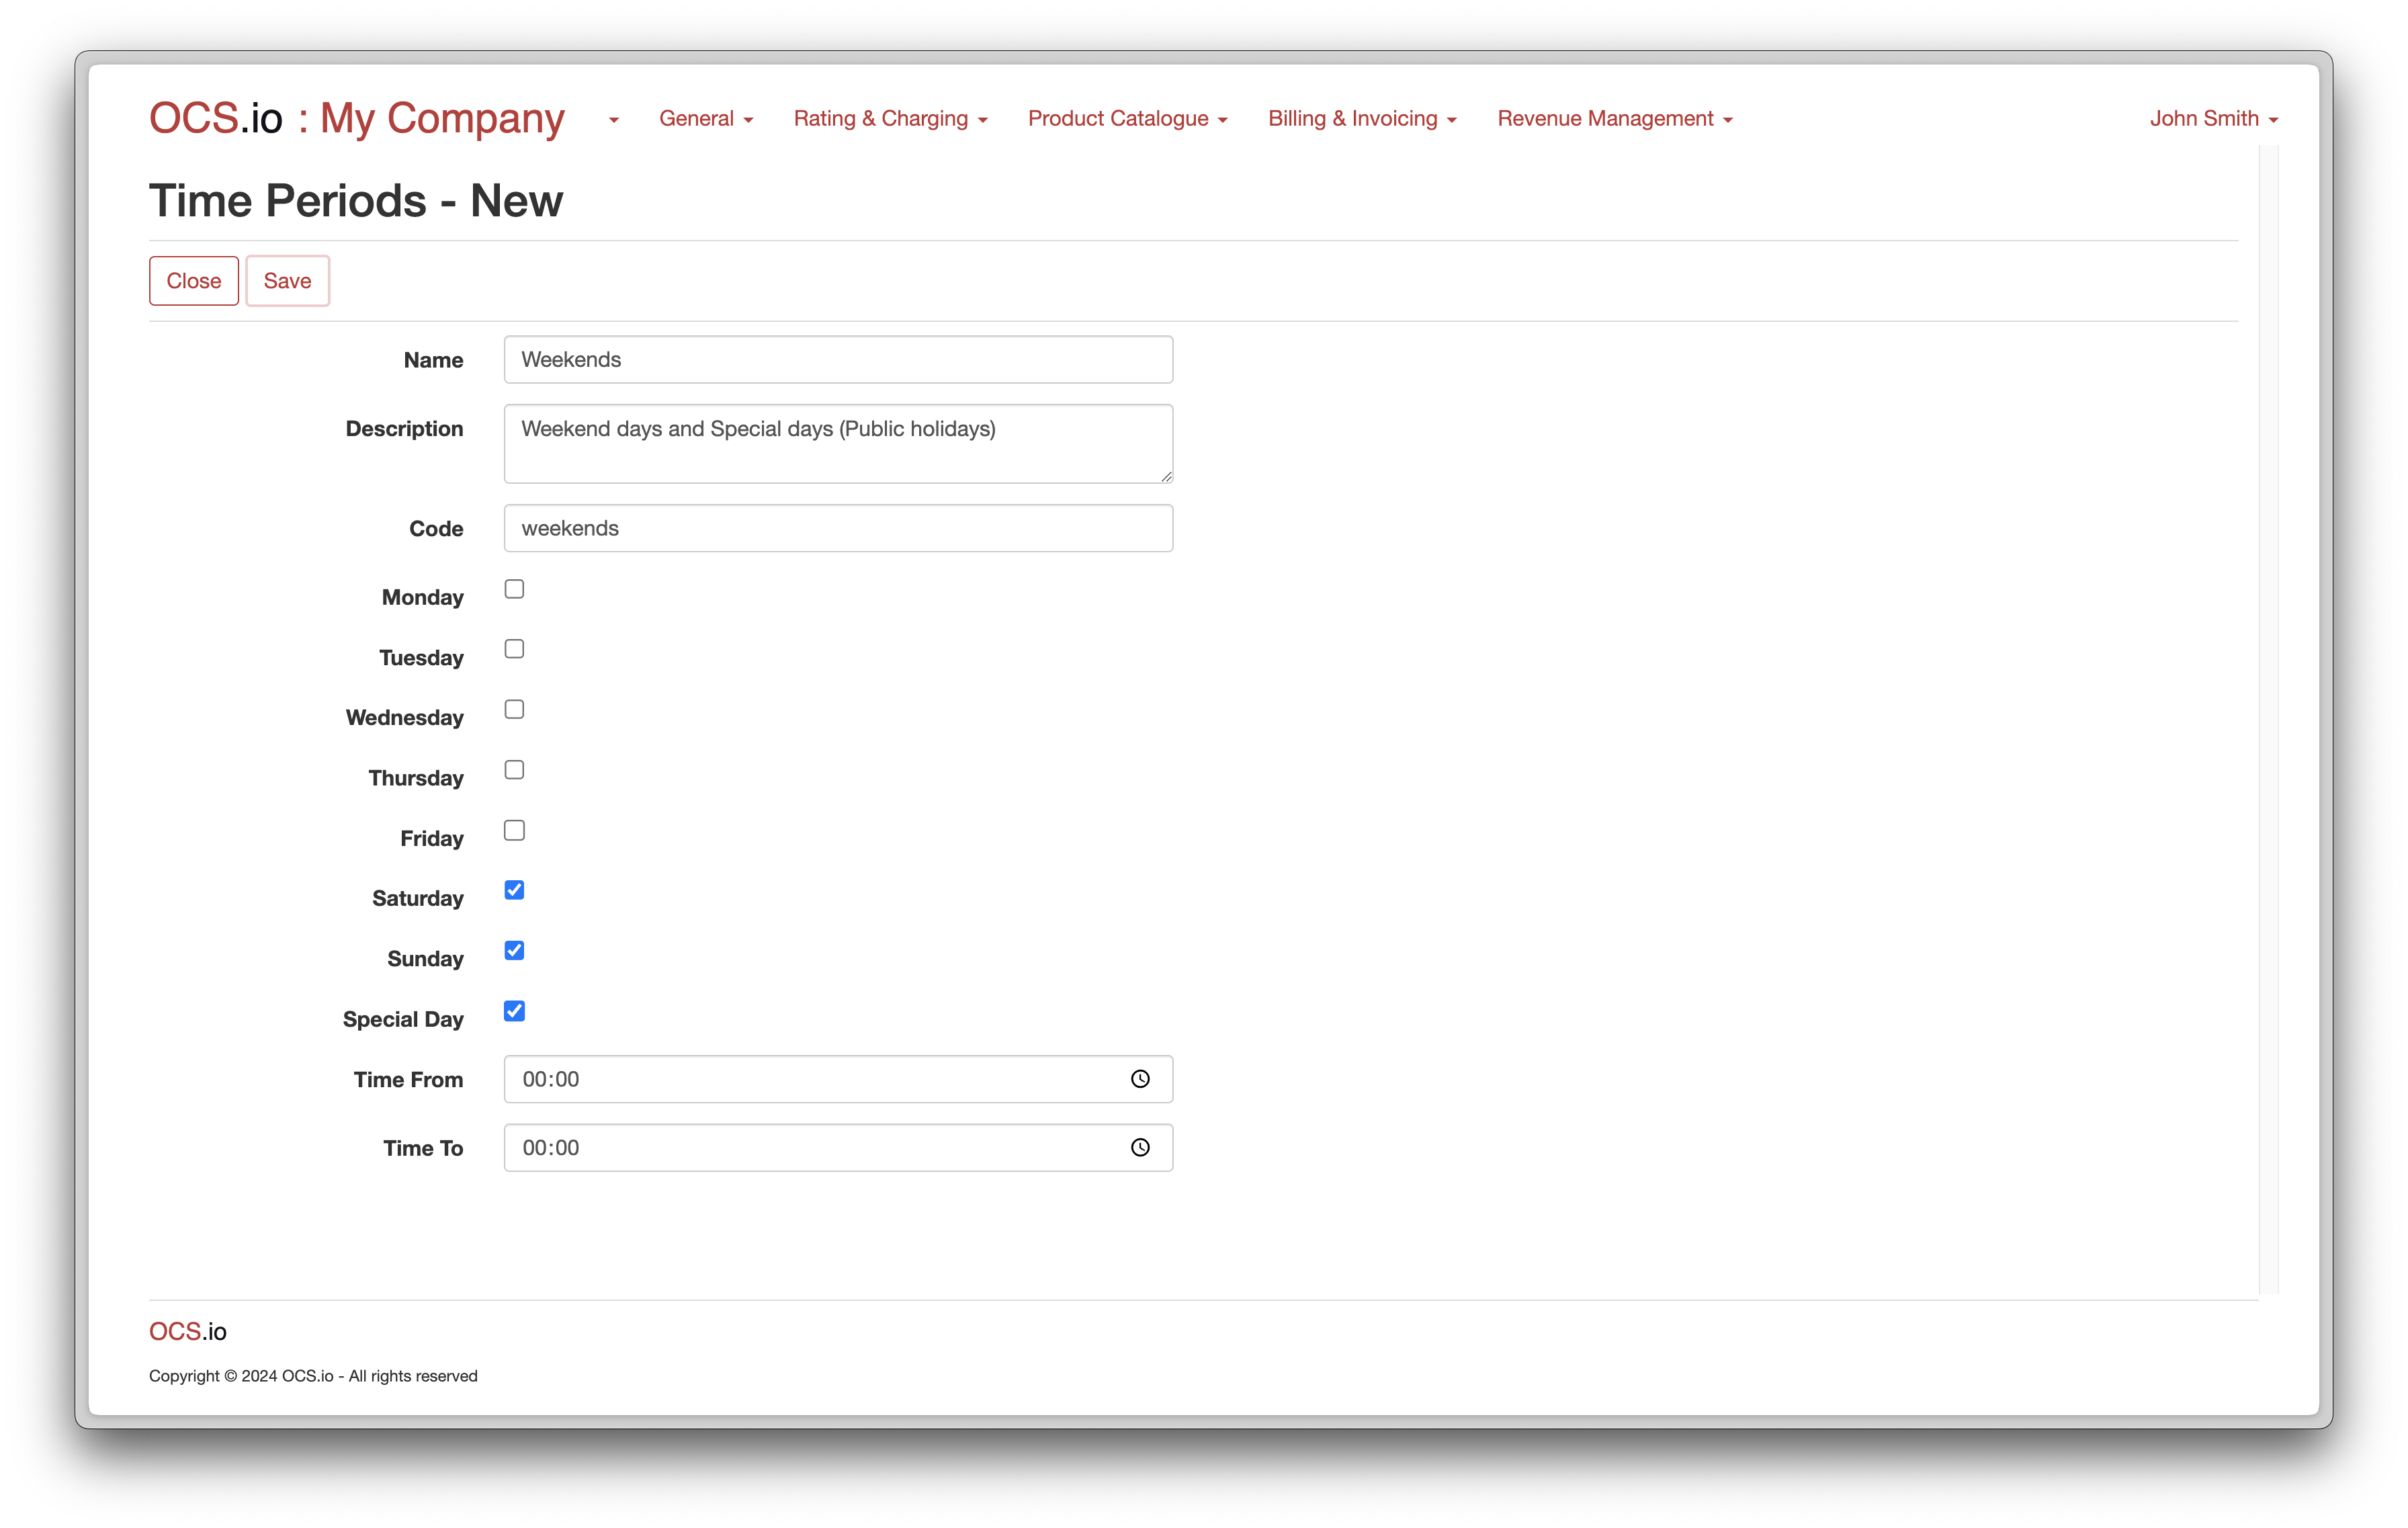
Time Periods
In OCS.io, Time Periods can specify different periods within a day. This feature is often utilized to differentiate usage between peak and off-peak periods.
For example, a mobile network operator may define a Period from 8:00 AM to 8:00 PM as the Peak period and another from 8:00 PM to 8:00 AM as the Off-Peak period. Usage during the Peak period may be charged at a higher rate than usage during the Off-Peak period.
To configure Time Periods, follow these steps:
-
Access the Core Configuration perspective in the OCS.io user interface.
-
Select the .
-
Click on the + (New) button to create a new Time Period.
-
Fill in the required information in the form:
| Item | Description |
|---|---|
Name |
Enter the name of the Time Period. |
Description |
Optionally, enter the description of the Time Period. |
Code |
Enter the code of the Time Period. This code will be used in the results of rating, charging, and billing. |
Monday - Sunday |
Check this box if the Time Period applies to Monday - Sunday. |
Special Day |
Check this box if the Time Period applies to Special Days (configured on a separate screen). |
Time From |
Optionally, enter the starting time within the configured day/s when the Time Period is applied. If populated, Time To must be configured. |
Time To |
Optionally, enter the ending time within the configured day/s when the Time Period is applied. If populated, Time From must be configured. |

Because we configured Workdays as Monday - Friday between 08:00 and 17:00, we must configure rest of the day time periods as follows:

Additionally, you can configure Time Period for Weekends and Holidays as follows:
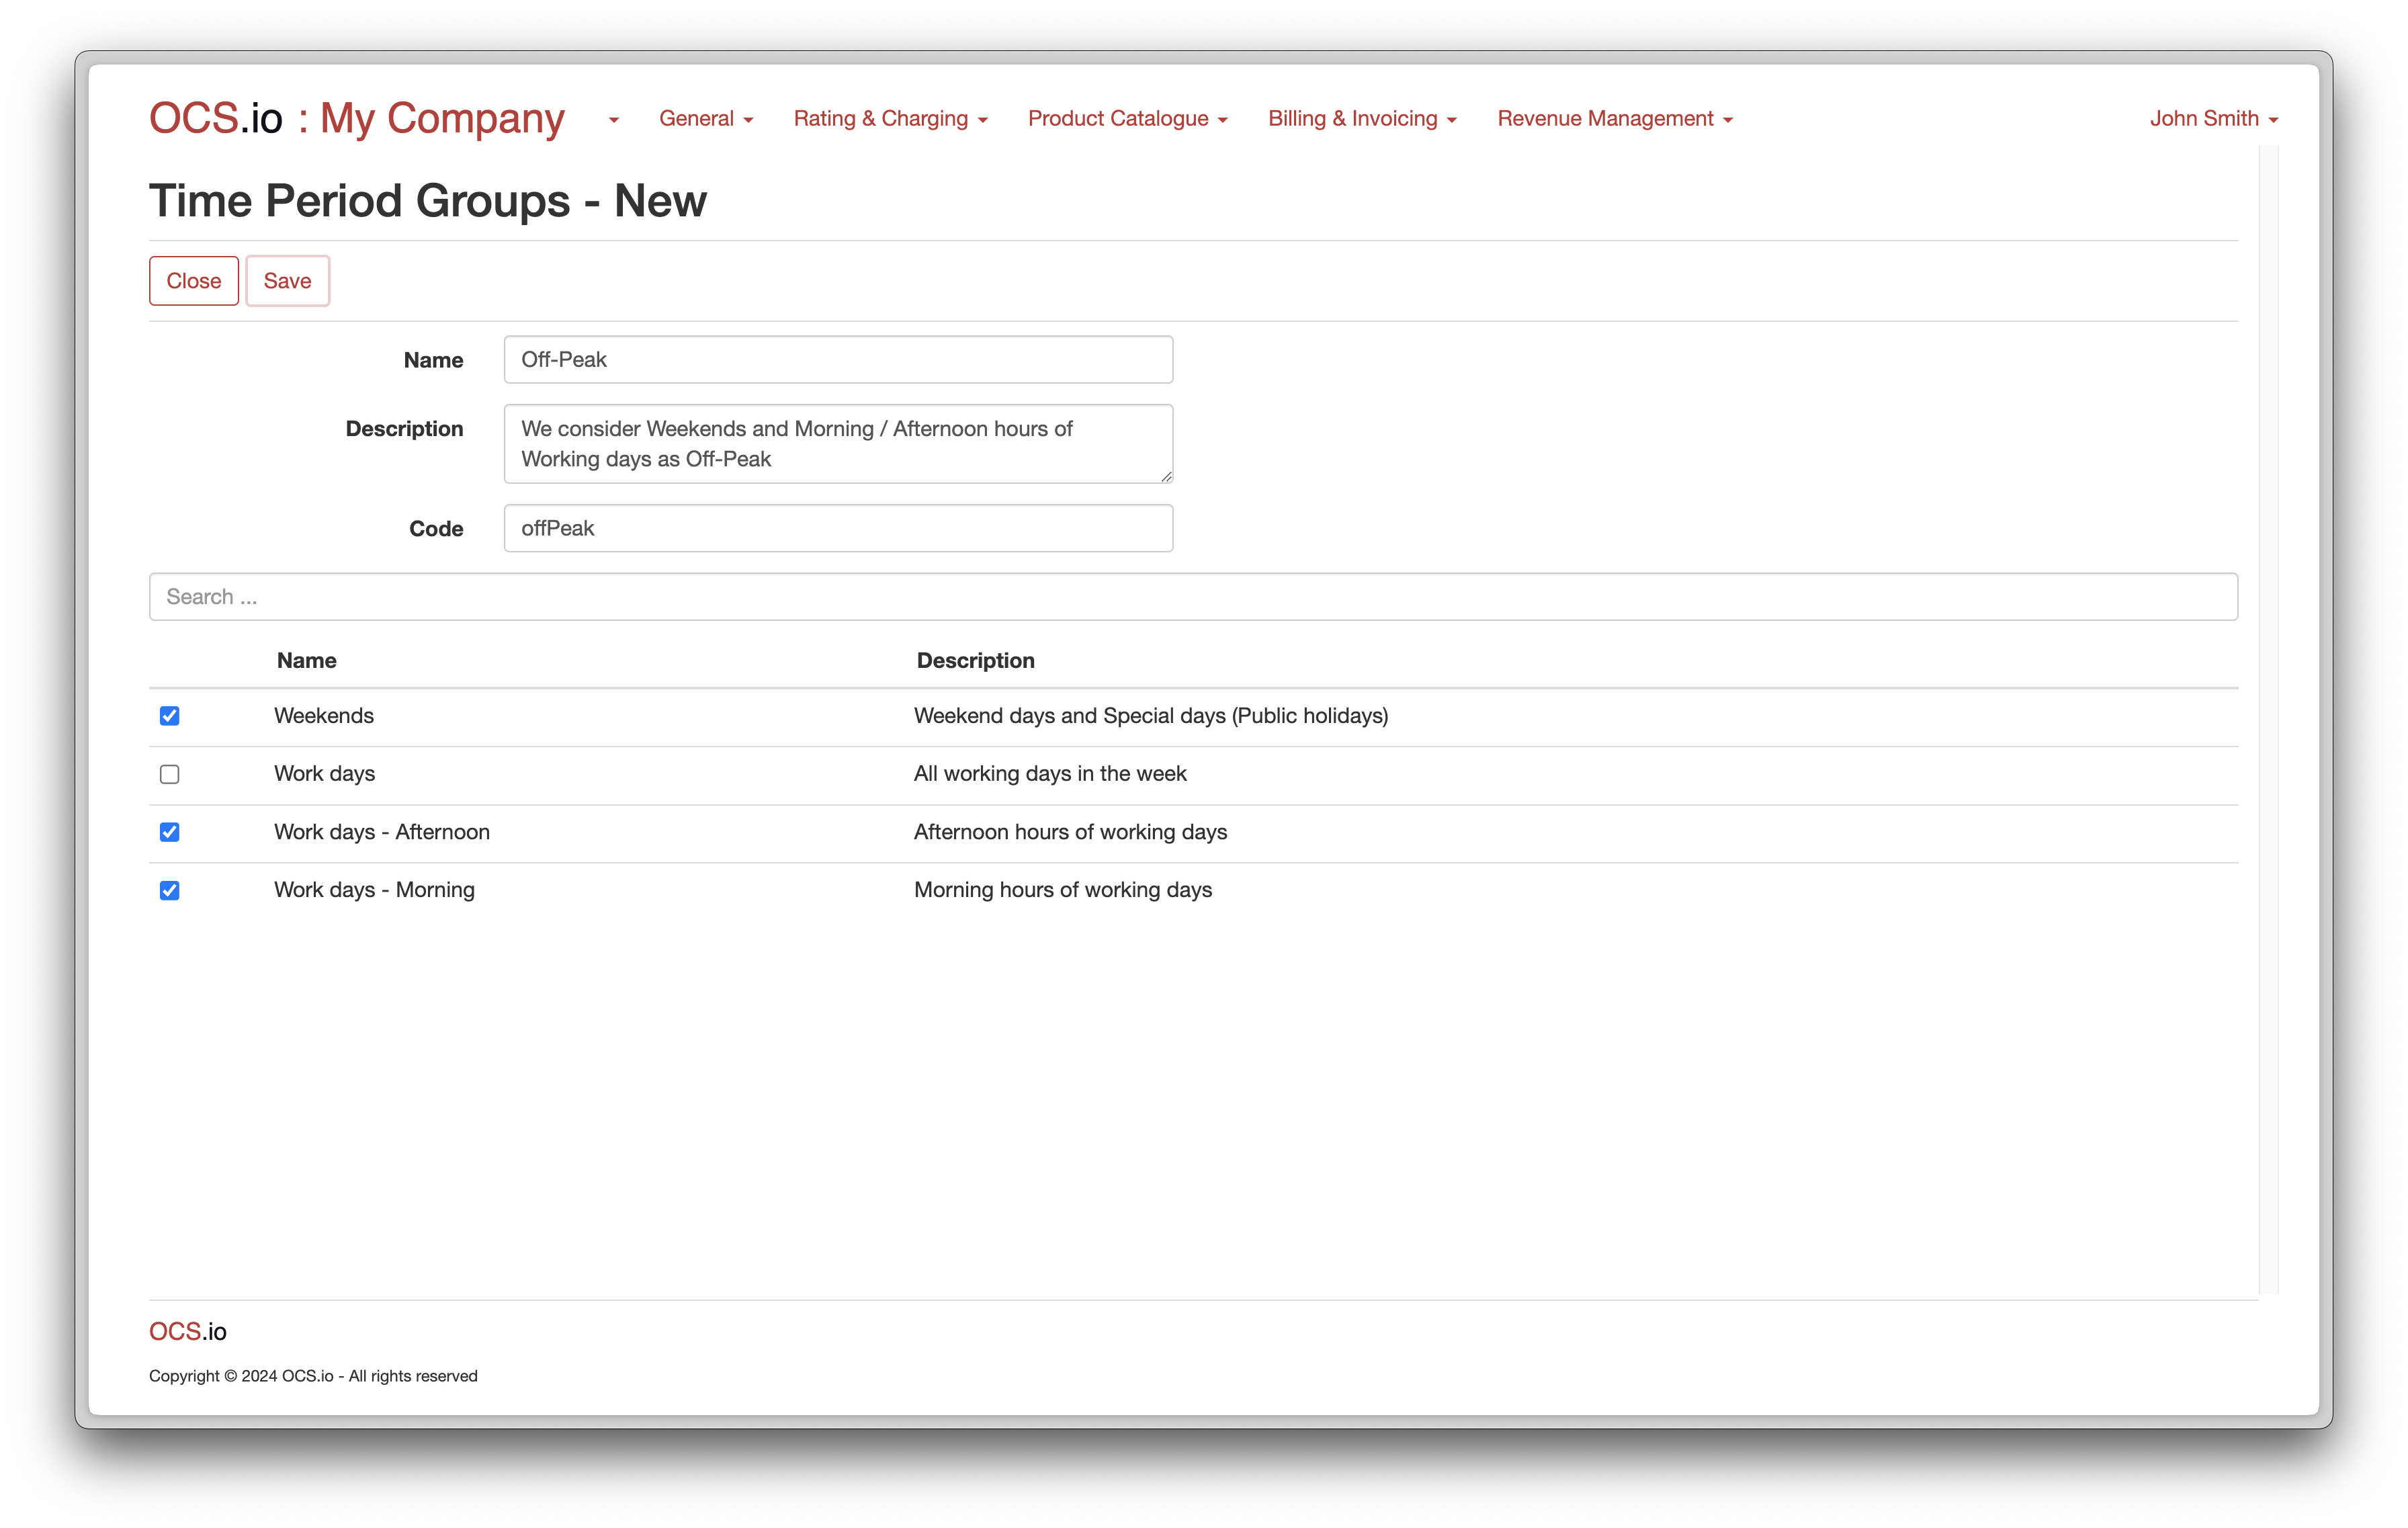
Time Period Groups
In OCS.io, Time Period Groups are a helpful feature for organizing multiple Time Periods into a single entity that can be used in other configurations.
For instance, you may have several Time Periods that define various pricing structures for different parts of the day, such as Off-Peak and Weekends. By grouping these Time Periods into a single Time Period Group, you can simplify the configuration process and make managing pricing for different services easier.
To configure Time Period Groups, follow these steps:
-
Access the Core Configuration perspective in the OCS.io user interface.
-
Select the .
-
Click on the + (New) button to create a new Time Period Group.
-
Fill in the required information in the form:
| Item | Description |
|---|---|
Name |
Enter the name of the Time Period Group. |
Description |
Optionally, enter the description of the Time Period Group. |
Code |
Enter the code of the Time Period Group. This code will be used in the results of rating, charging, and billing. |
Time Periods |
Check all Time Periods that apply to the Time Period Group. |
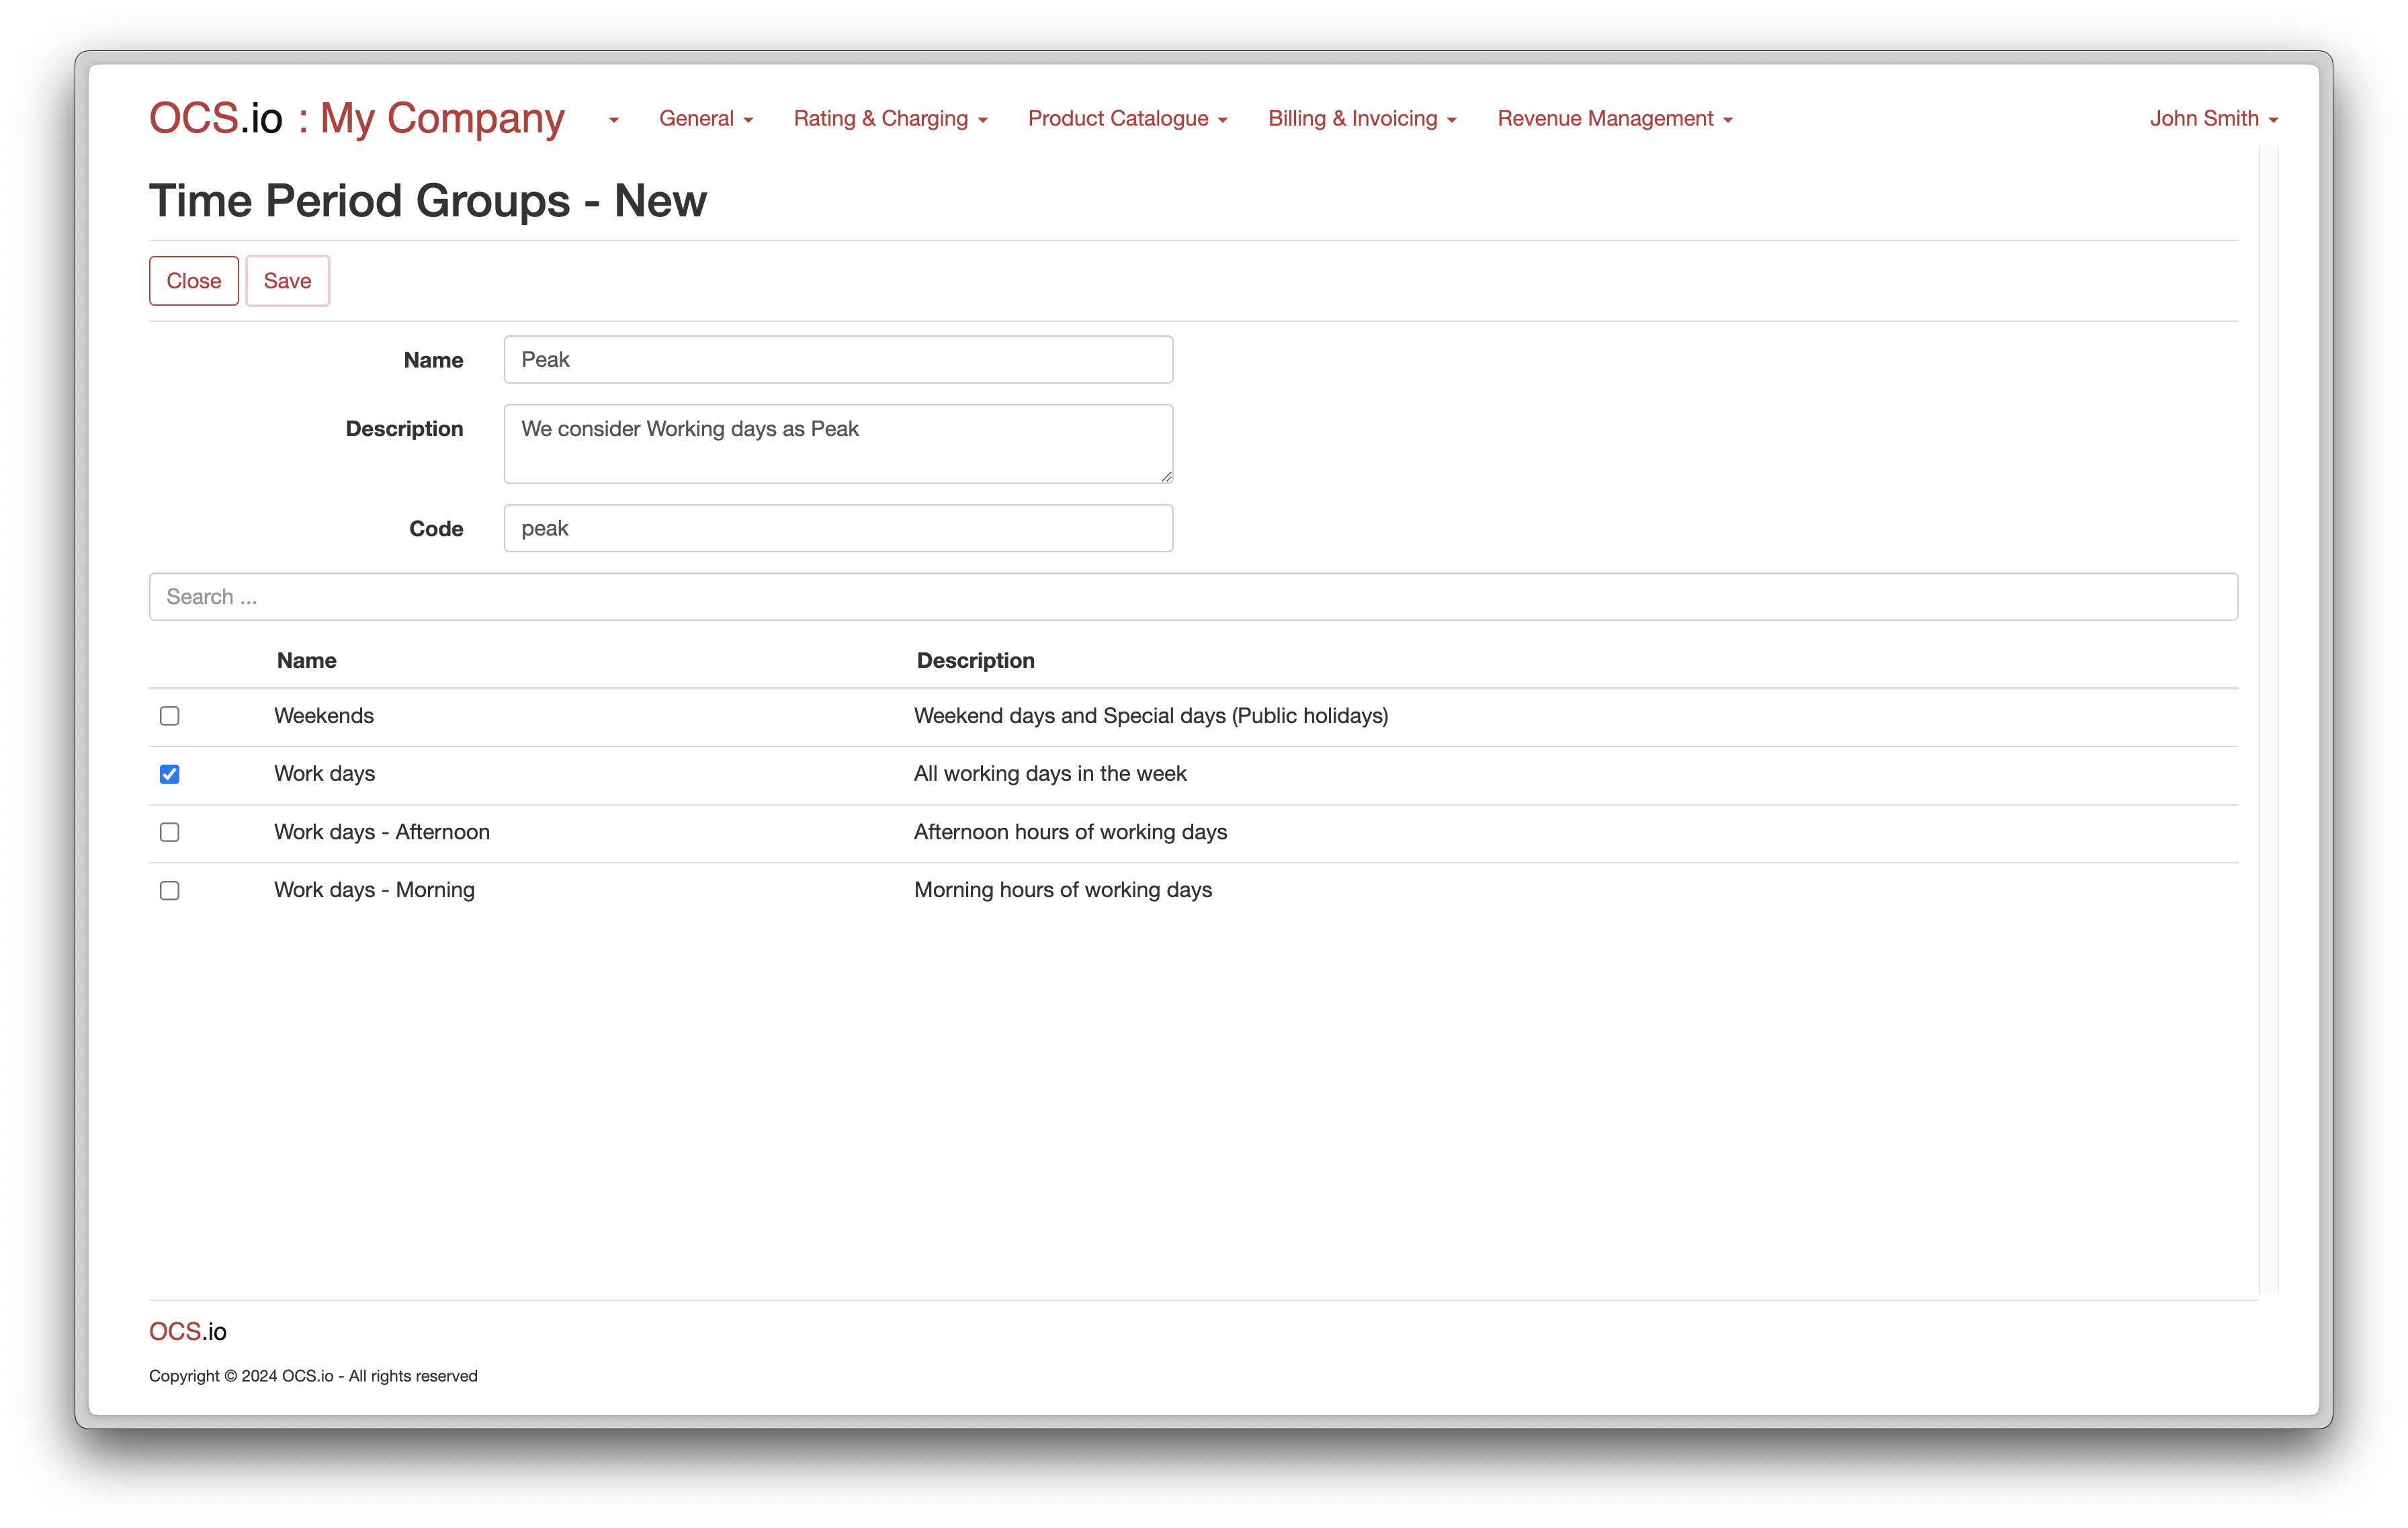
Additionally, you can configure also Timer Period Group for Off-Peak as follows: